The last part of the series 3 – Take Off – V1 we finished when we could build hte application using ANT on the local machine. In this part we are going to try this on the Oracle Developer Cloud. Finally we should see how Continuous Integration and Continuous Delivery works in the cloud.
 NOTE
NOTE
I created a fresh set of ANT build scripts named ‘buildlocal.xml’ and ‘buildlocal.properties’ from the project to demonstrate the process. The original ones name ‘build.xml’ and ‘build.properties’ are the final result which I didn’t want to revert. So when you create the ANT scripts yourself you can user the default names ‘build.xml’ and ‘build.properties’. When I talk about build files I now mean the ones named ‘buildlocal.*’.

Demo Build Files
For the same reason we create a new build job in the cloud names ADFTestBuild to show the steps to take. The final build job is named ADFCommunuityFrkExt.

Demo Build Job
We pushed the files local build files already to the remote repository. Let’s run the build on the could. First we log into the Oracle Developer Cloud as team member and switch to the build tab and create a new build job (ADFTestBuild)
-

-
Create new build job
-

-
Name the job
-

-
Fill in the name and JDK
-

-
Select the repository and branch to use
-

-
Build triggers
-

-
Create ANT build step
-

-
Select build file and target
-

-
After build step
Note that we use JDK 7 to build the project. The Oracle Developer Cloud offers JDK 6-8 to work with. As we use JDev 12.1.3 we use JDK 7

JDK’s available
In the Source Code Management section we select the repository and branch to use for this job. The advanced section can be left blank as it’s filled by the system when you save the job. There are more advanced option you can set but they are not part of this post. All we nach to remember
NOTE
Builds are dependent on ONE branch
NOTE
The Build Trigger defines that each minute the CI system checks the SCM if something has changed. If yes, it schedules to execute the build job.
When we are finished with the feature we have to change the build job or to create a new one which uses the master or default branch to build on. In our situation where we implement the CI we set the branch to the one we are working on named ‘feature-setup-build’.
After saving the new job we can start it by clicking on the ‘Run Now’ button
-

-
Start build job
-

-
Build running
-

-
Build finished with error
Hm, the build did not work as it did on the local machine. This is shown by the icon in the first column of the job history table. To find out what went wrong we look at the output of the build by clicking on the ‘console’ button in the last column of hte table

Build output
In the first marked section we see the build file ‘buildlocal.xml’ which was used and in the second marked section the error message. It looks liek the build job can’t find the task ‘OJDeployAntTask’. A look into the buildlocal.xml file at line 40 reveals
   <taskdef name="ojdeploy" classname="oracle.jdeveloper.deploy.ant.OJDeployAntTask" uri="oraclelib:OJDeployAntTask"
             classpath="${oracle.jdeveloper.ant.library}"/>
where line 40 is the classpath in the above listing. This means that the variable “${oracle.jdeveloper.ant.library}” is not found. A look into the Oracle Developer Cloud at Developing Oracle ADF Applications with Oracle Developer Cloud Service give the needed information. We have to alter the build files
1. add a line
<property environment="env"/>
to the build.xml file before loading the build.properties
2. change the build.properties file to use information from the now loaded environemnt
The second part is a bit confusing. From the link above we learn to set a variable as
oracle.home=${env.ORACLE_HOME}
which is misleading a bit. The problem is that the developer cloud offers two environments to the user. One for 11g and one for 12c. As we use the one for 12c we have to use a different setup which can be found in the docs too at a different location Using Hudson Environment Variables. The second link tells us to use
oracle.home=${env.ORACLE_HOME12C3}
NOTE
Add property environment="env" to your build.xml to load the environment of the server
NOTE
Add
oracle.home=${env.ORACLE_HOME_12C3}
oracle.commons=${env.MIDDLEWARE_HOME_12C3}/oracle_common
middleware.home=${env.MIDDLEWARE_HOME_12C3}
install.dir=${env.ORACLE_HOME_12C3}
to the build.properties file to make use of hte servers environment.
With this info we can make the needed changes. The resulting build.properties is
#Fri Jul 24 15:06:08 CEST 2015
#Change the next three properties to match your projects names
workspace.name=ADFCommunityFrkExt
workspace=${env.WORKSPACE}
project.viewcontroller.name=FrkExtModel
project.deploy.folder=deploy
oracle.jdeveloper.deploy.profile.name=adflibADFCommunityFrkExt
output.dir=classes

# Don't change anything below!
oracle.home=${env.ORACLE_HOME_12C3}
oracle.commons=${env.MIDDLEWARE_HOME_12C3}/oracle_common
middleware.home=${env.MIDDLEWARE_HOME_12C3}
install.dir=${env.ORACLE_HOME_12C3}

#Flags
javac.deprecation=off
javac.nowarn=off
java.debug=on

project.workspace.file=${workspace.name}.jws
oracle.jdeveloper.ant.library=${oracle.home}/jdev/lib/ant-jdeveloper.jar
oracle.jdeveloper.workspace.path=${workspace}/${workspace.name}.jws
oracle.jdeveloper.project.name=${project.viewcontroller.name}
oracle.jdeveloper.deploy.dir=${workspace}/${project.deploy.folder}
oracle.jdeveloper.ojdeploy.path=${env.ORACLE_HOME_12C3}/jdev/bin/ojdeploy${env.EXEC_SUFFIX}
oracle.jdeveloper.deploy.outputfile=${workspace}/${project.deploy.folder}/${oracle.jdeveloper.deploy.profile.name}
and the build.xml
<?xml version="1.0" encoding="UTF-8" ?>
<!--Ant buildfile generated by Oracle JDeveloper-->
<!--Generated Aug 22, 2015 3:15:37 PM-->
<project xmlns="antlib:org.apache.tools.ant" name="FrkExtModel" default="all" basedir=".">
<property environment="env"/>
<property file="build.properties"/>
<path id="library.ADF.Model.Runtime">
<pathelement location="${oracle.commons}/modules/oracle.idm_12.1.3/identitystore.jar"/>
<pathelement location="${oracle.commons}/modules/oracle.adf.model_12.1.3/adfm.jar"/>
<pathelement location="${oracle.commons}/modules/groovy-all-2.1.6.jar"/>
<pathelement location="${oracle.commons}/modules/oracle.adf.model_12.1.3/adftransactionsdt.jar"/>
<pathelement location="${oracle.commons}/modules/oracle.adf.view_12.1.3/adf-dt-at-rt.jar"/>
<pathelement location="${oracle.commons}/modules/oracle.adf.model_12.1.3/adfdt_common.jar"/>
<pathelement location="${oracle.commons}/modules/oracle.adf.model_12.1.3/adflibrary.jar"/>
<pathelement location="${oracle.commons}/modules/oracle.xdk_12.1.3/xmlparserv2.jar"/>
<pathelement location="${oracle.commons}/modules/oracle.adf.model_12.1.3/db-ca.jar"/>
<pathelement location="${oracle.commons}/modules/oracle.adf.model_12.1.3/jdev-cm.jar"/>
<pathelement location="${oracle.commons}/modules/oracle.ldap_12.1.3/ojmisc.jar"/>
<pathelement location="${oracle.commons}/modules/oracle.adf.share_12.1.3/commons-el.jar"/>
<pathelement location="${oracle.commons}/modules/oracle.adf.share_12.1.3/jsp-el-api.jar"/>
<pathelement location="${oracle.commons}/modules/oracle.adf.share_12.1.3/oracle-el.jar"/>
<pathelement location="${oracle.commons}/modules/oracle.adf.security_12.1.3/adf-share-security.jar"/>
<pathelement location="${oracle.commons}/modules/oracle.adf.security_12.1.3/adf-controller-security.jar"/>
<pathelement location="${oracle.commons}/modules/javax.mail_2.0.0.0_1-4-4.jar"/>
</path>
<path id="classpath">
<path refid="library.ADF.Model.Runtime"/>
</path>
<target name="init">
<tstamp/>
<mkdir dir="${output.dir}"/>
</target>
<target name="info">
<echo level="info">build: env.ORACLE_HOME=${env.ORACLE_HOME_12C3}</echo>
<echo level="info">build: env.WORKSPACE=${env.WORKSPACE}</echo>
<echo level="info">build: workspace=${workspace}</echo>
<echo level="info">build: install.dir=${env.ORACLE_HOME_12C3}</echo>
<echo level="info">build: oracle.commons=${oracle.commons}</echo>
<echo level="info">build: oracle.jdeveloper.ant.library=${oracle.jdeveloper.ant.library}</echo>
<echo level="info">build: oracle.jdeveloper.ojdeploy.path=${oracle.jdeveloper.ojdeploy.path}</echo>
<echo level="info">build: oracle.jdeveloper.deploy.dir=${oracle.jdeveloper.deploy.dir}</echo>
<echo level="info">build: oracle.jdeveloper.deploy.profile.name=${oracle.jdeveloper.deploy.profile.name}</echo>
<echo level="info">build: oracle.jdeveloper.workspace.path=${oracle.jdeveloper.workspace.path}</echo>
<echo level="info">build: oracle.jdeveloper.deploy.outputfile=${oracle.jdeveloper.deploy.outputfile}</echo>
</target>
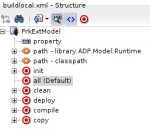
<target name="all" description="Build the project" depends="info,deploy,compile,copy"/>
<target name="clean" description="Clean the project">
<delete includeemptydirs="true" quiet="true">
<fileset dir="${output.dir}" includes="**/*"/>
</delete>
</target>
<target name="deploy" description="Deploy JDeveloper profiles" depends="init">
<taskdef name="ojdeploy" classname="oracle.jdeveloper.deploy.ant.OJDeployAntTask" uri="oraclelib:OJDeployAntTask"
classpath="${oracle.jdeveloper.ant.library}"/>
<ora:ojdeploy xmlns:ora="oraclelib:OJDeployAntTask" executable="${oracle.jdeveloper.ojdeploy.path}"
ora:buildscript="${oracle.jdeveloper.deploy.dir}/ojdeploy-build.xml"
ora:statuslog="${oracle.jdeveloper.deploy.dir}/ojdeploy-statuslog.xml">
<ora:deploy>
<ora:parameter name="workspace" value="${oracle.jdeveloper.workspace.path}"/>
<ora:parameter name="project" value="${oracle.jdeveloper.project.name}"/>
<ora:parameter name="profile" value="${oracle.jdeveloper.deploy.profile.name}"/>
<ora:parameter name="nocompile" value="false"/>
<ora:parameter name="outputfile" value="${oracle.jdeveloper.deploy.outputfile}"/>
</ora:deploy>
</ora:ojdeploy>
</target>
<target name="compile" description="Compile Java source files" depends="init">
<javac destdir="${output.dir}" classpathref="classpath" debug="${javac.debug}" nowarn="${javac.nowarn}"
deprecation="${javac.deprecation}" encoding="UTF8" source="1.7" target="1.7" includeantruntime="false">
<src path="src"/>
</javac>
</target>
<target name="copy" description="Copy files to output directory" depends="init">
<patternset id="copy.patterns">
<include name="**/*.GIF"/>
<include name="**/*.JPEG"/>
<include name="**/*.JPG"/>
<include name="**/*.PNG"/>
<include name="**/*.cpx"/>
<include name="**/*.dcx"/>
<include name="**/*.ejx"/>
<include name="**/*.gif"/>
<include name="**/*.ini"/>
<include name="**/*.jpeg"/>
<include name="**/*.jpg"/>
<include name="**/*.png"/>
<include name="**/*.properties"/>
<include name="**/*.sva"/>
<include name="**/*.tag"/>
<include name="**/*.tld"/>
<include name="**/*.wsdl"/>
<include name="**/*.xcfg"/>
<include name="**/*.xlf"/>
<include name="**/*.xml"/>
<include name="**/*.xsd"/>
<include name="**/*.xsl"/>
<exclude name="build.xml"/>
</patternset>
<copy todir="${output.dir}">
<fileset dir="src">
<patternset refid="copy.patterns"/>
</fileset>
<fileset dir=".">
<patternset refid="copy.patterns"/>
</fileset>
</copy>
</target>
</project>
The files above are the original ones and can be run from the build console to get this
Great, we now have successfully enabled CI in the cloud for the ‘Framework Extension’ project. Well, there is something more to think about. Can’t we use the same ANT build scripts on the local machine too?
Yes, we can but we have to make some adjustments for this.
Now that we read the environment from the server the ANT script is running on to set the some of the variables we need to set these environment variables on the local machine too. this can be done easily by altering the jdev start file (Linux) or using a batch to first set the environment variables and then start jdev (Windows). Below is my changes jdev start script
#!/bin/bash

#=============================================================================
#  Launcher for Oracle JDeveloper 12c (12.1.2.0.0)
#=============================================================================

unset -v GNOME_DESKTOP_SESSION_ID
export MIDDLEWARE_HOME_12C3=/opt/jdev/12.1.3.0.0/Oracle/Middleware
export ORACLE_HOME_12C3=/opt/jdev/12.1.3.0.0/Oracle/Middleware/Oracle_Home/jdeveloper
export WORKSPACE=/data/development/ENTW_12.1.3.0.0
export EXEC_SUFFIX=
/opt/jdev/12.1.3.0.0/Oracle/Middleware/Oracle_Home/jdeveloper/jdev/bin/jdev $1
As you see I set the environment variables which are later read through the build.xml file before starting jdeveloper.
The one line
export EXEC_SUFFIX=
need special attention. It’s only necessary if you run JDev using different operating systems (Linux and Windows). The build file has one variable pointing to the the ojdeploy executable
oracle.jdeveloper.ojdeploy.path=${env.ORACLE_HOME_12C3}/jdev/bin/ojdeploy${env.EXEC_SUFFIX}
Users using Windows need to add the suffix ‘.exe’ to this variable as ojdeploy can’t be started otherwise under Windows.
The problem is that we can’t add it for Linux systems as they don’t know this suffix. The solution I found is to add ${env.EXEC_SUFFIX} to the executable and set it to an empty string for Linux systems. For Windows systems you have to set this environment variable to ‘.exe’. For this I use a batch file where I use
~~~setx EXEC_SUFFIX .exe~~~
before starting JDev. In the same batch I set the other variables too
setx ORACLE_HOME_12C3 r:\Java\12.1.3.0.0\Oracle\Middleware\jdeveloper
setx MIDDLEWARE_HOME_12C3 r:\Java\12.1.3.0.0\Oracle\Middleware
setx EXEC_SUFFIX .exe
NOTE
To make the build files work under Windows and Linux and iOS add an environment variable defining the suffix for executable files.
One final trick is to set the workspace directory. The build.properties file has one more environment variable workspace=${env.WORKSPACE} which we need to set.
As the workspace isn’t fix on a local machine, at least if you have more than one workspace, you can’t set this variable before you start JDev. This has to be done per workspace, when you change the workspace.
JDev has a solution for this in the ANT properties section

ANT Project Properties
You can shoose from different variables JDev sets according to the workspace and project you are working with.

JDeveloper Variables
NOTE
Set the env.WORKSPACE environment variable in the ANT properties of the project.
This concludes this part of the series. In the next post we finish the feature ‘feature-setup-build’ by introducing the code review function of the Oracle Developer Cloud. This will be followed by a post about building a simple ADF application with a UI which you use to show the Continuous Delivery (CD) option of the Oracle Developer Cloud.