JDeveloper: Delete Row from POJO based Table

A question on the JDeveloper & ADF OTN forum about removing rows from a table which is based on a list of POJOs provides the reason for this blog post. The implementation, as simple as it is, holds a surprise.

The sample application build for this sample shows the POJO and the list of POJOs built from it. The list is lazy initialized at the time it’s first accessed (see https://tompeez.wordpress.com/2014/10/18/lazy-initalizing-beans/ for more info on this technique). On the only page a table build from this list.

             <af:table value="#{viewScope.TableHandlerBean.phoneInfoList}" var="row" rowBandingInterval="0" id="t1" columnStretching="multiple"
                        rowSelection="single" varStatus="rowStatus" styleClass="AFStretchWidth">
...

In the last column we add a button which should remove the row.

...
                <af:column sortable="false" headerText="Remove" id="c4">
                  <af:commandButton text="Remove" id="cb1" actionListener="#{viewScope.TableHandlerBean.onRemoveAction}">
                    <af:setPropertyListener from="#{rowStatus.index}" to="#{viewScope.TableHandlerBean.currentSelectedIndex}" type="action"/>
                  </af:commandButton>
                </af:column>
...

As the table is build on a list, we can’t use the default selection listener to get the selected row. Instead we use a setPropertyListener to pass the selected row index to a viewScope variable.

   public void onRemoveAction(ActionEvent actionEvent) {
        Integer currentIndex = getCurrentSelectedIndex();
        logger.info("Removing with index : >> " + currentIndex);
        logger.info("Removing with size : >> " + phoneInfoList.size());
        logger.info("Value in List ** "+phoneInfoList.get(currentIndex).getSequence()+" phone "+phoneInfoList.get(currentIndex).getPhoneType());
        phoneInfoList.remove(currentIndex);
        logger.info("size after removing : >> " + phoneInfoList.size());
        UIComponent ui = (UIComponent) actionEvent.getSource();
        AdfFacesContext.getCurrentInstance().addPartialTarget(ui.getParent().getParent());
    }

   public Integer getCurrentSelectedIndex() {
        return currentSelectedIndex;
    }

The actionListener we use for the remove button picks up the row index and users the default remove() method of the list interface to remove the row from the list.
Finally we send a ppr to the table to visualize the change.
The surprise comes when we run the code and find that removing the selected row doesn’t work.

We don’t get an error message in the log. This is surprising as a simple delete of an element from an ArrayList should not be a problem.

Question is what happened and why?
Do you spot the problem in the code above?
A look at the Javadoc API for the List interface

JavaDoc of List interface (part)

JavaDoc of List interface (part)


shows two remove methods. We passed the index of the row, so it should have worked!
But wait, a close look at the JavaDoc shows that one of the remove methods gets an object as parameter. Well, the return parameter of the getCurrentSelectedIndex() method is an Integer object!
Now it’s clear. As we passed an object to the remove method the list implementation looks for an object which equals the passed object. Not finding one it doesn’t remove anything from the list and it don’t give an error message as this can be a normal result of this operation.
The only hint we could have gotten is that the return parameter of the remove method will return null instead of the removed element. This we did not check.
Anyway, changing the code to

    /**
     * Listener for the remove button in a table row
     * @param actionEvent tigger of the event
     */
    public void onRemoveAction(ActionEvent actionEvent) {
        // Get the index to remove
        Integer currentIndex = getCurrentSelectedIndex();
        logger.info("Removing with index : >> " + currentIndex);
        logger.info("Removing with size : >> " + phoneInfoList.size());
        logger.info("Value in List ** " + phoneInfoList.get(currentIndex).getSequence() + " phone " + phoneInfoList.get(currentIndex).getPhoneType());
        // remove the index. Here we need t opass the int value as the Integer would be interpreted as object to delete. As this object can't be found
        // the list would stay as is. There wouldn't even an error message.
        // To find out if the object was removed you hav eto check the return value. If it's not null it is the element which has been removed.
        PhoneInfoDTO dTO = phoneInfoList.remove(currentIndex.intValue());
        logger.info("size after removing : >> " + phoneInfoList.size());
        if (dTO == null) {
            logger.warning("Element with index " + currentIndex + " not found in list!");
        }
        // get the source and trigger a ppr on the container the table resides in
        UIComponent ui = (UIComponent)actionEvent.getSource();
        AdfFacesContext.getCurrentInstance().addPartialTarget(ui.getParent().getParent().getParent());
    }

makes the application run as desired. The trick it to pass the int value of the currentIndex Interger object.

You can download the sample (the final working one) from github BlogPoJoTableDeleteRow.zip. The sample runs without a DB connection.

JDeveloper: Showing a Popup when Selecting an af:selectOneRadio

A question on the new OTN JDeveloper and ADF forum (or space if you like the new name better) inspired this post.

Use Case
The use case is to show a popup each time the user clicks on one of the radiobuttons of a button group. This popup should show an inputText component to let the user enter some text for the selection. After the selection the text is shown on the page under the button group.
To make it more interesting, it was not ask for this in the question, the popup should show which radio button was clicked.
UPDATE
An additional question on the OTN forum asks how to display the label of the selected radiobutton and not it’s value. I updated the workspace to show how to implement this.

Implementation UPDATE
The use case sounds easy first: add a showPopupBehavior to the selectItem to show the popup and show the selected radioValue as the title of the dialog inside the popup. Problem with this solution is that a selectItem can’t handle client listeners, which a showPopupBehavior is under the hood. If you try this you get an error

Caused by: javax.servlet.jsp.JspException: ADF_FACES-60023:Component: RichSelectItem[UIXFacesBeanImpl, id=si10] does not support client listeners.

Putting the showPopupBehavior onto the af:selectOneRadio isn’t a solution either as this would would allow to show the popup, but would prevent the selection of the radio button. This is because the showPopupBehavior is a client behavior tag which prevents the event to
go further.

The solution to the problem is to use a valueChangeListener on the af:selectOneRadio and show the popup from the bean code. Before showing the popup we need to process the value change event to get the selected value in the dialog of the popup.

The UI part looks like

        <af:panelGroupLayout id="pgl2">
          <af:selectOneRadio label="Activation" id="sor1" value="#{bindings.SelectedActivation1.inputValue}"
                             inlineStyle="border-width:thin; border-color:Blue; border-style:solid;"
                             valueChangeListener="#{RadiobuttonPopupBean.activationChangedListener}" autoSubmit="true">
            <af:selectItem label="Active" value="active" id="si1"/>
            <af:selectItem label="Inactive" value="not active" id="si2"/>
          </af:selectOneRadio>
          <af:outputText value="Last reason: #{bindings.PopupText1.inputValue}" id="ot1" partialTriggers="d1"/>
        </af:panelGroupLayout>
        <af:popup id="p1" contentDelivery="lazyUncached" binding="#{RadiobuttonPopupBean.radioPopup}">
          <af:dialog id="d1" title="Selected: #{bindings.SelectedActivation1.inputValue}">
            <af:inputText label="Reason" id="it1" value="#{bindings.PopupText1.inputValue}"/>
          </af:dialog>
        </af:popup>

The listener code in the bean, which is created in request scope as it contains a reference to a ui component, look like

import javax.faces.context.FacesContext;
import javax.faces.event.ValueChangeEvent;

import oracle.adf.view.rich.component.rich.RichPopup;

import org.apache.myfaces.trinidad.util.ComponentReference;

public class RadiobuttonPopupBean {
    private ComponentReference radioPopup;

    public void setRadioPopup(RichPopup radioPopup) {
        this.radioPopup = ComponentReference.newUIComponentReference(radioPopup);
    }

    public RichPopup getRadioPopup() {
        if (radioPopup != null)
            return (RichPopup)radioPopup.getComponent();

        return null;
    }

    public void activationChangedListener(ValueChangeEvent valueChangeEvent) {
        // process updates to get the selected value inside the popup
        FacesContext contxt = FacesContext.getCurrentInstance();
        valueChangeEvent.getComponent().processUpdates(contxt);
        //show the popup
        RichPopup.PopupHints hint = new  RichPopup.PopupHints();
        getRadioPopup().show(hint);
    }
}

The application running look like


You see that the popup shows the value of the selected radio button as the title and the entered text in the popup is shown as ‘last reason’ below the radio button group. This ‘magic’ is done by simply adding a partial trigger to the outputText component which is listening to the dialog inside the popup.
As the sample don’t store the value of the selection of the radio group or the entered text in the db, I use the variable iterator to store these values. More about this technique can be found in my blog

UPDATED IMPLEMENTATION
As the use case changed a bit I changes the solution in a way to show how to implement this. First step is that I added another attribute to the variables iterator to store the selected label. The attribute is name ‘SelectedActivation1’ and is of type String. This attribute is needed as it’s not easyly possible to get the selected label of the radiobutton outside the selection listener. The changed valueChangeListener looks like the code below:

    public void activationChangedListener(ValueChangeEvent valueChangeEvent) {
        // process updates to get the selected value inside the popup
        FacesContext contxt = FacesContext.getCurrentInstance();
        valueChangeEvent.getComponent().processUpdates(contxt);
        //get the selected lable from the radio button
        // for this we need to iterate over the children of hte af:selectOneRadio
        // and find the child which has the same value as the new value
        RichSelectOneRadio rsoc =
            (RichSelectOneRadio)valueChangeEvent.getSource();
        List childList = rsoc.getChildren();
        String newVal = (String)valueChangeEvent.getNewValue();
        for (int i = 0; i < childList.size(); i++) {
            if (childList.get(i) instanceof RichSelectItem) {
                RichSelectItem csi = (RichSelectItem)childList.get(i);
                if (((String)csi.getValue()).equals(newVal)) {
                    // get the binding container
                    BindingContainer bindings = BindingContext.getCurrent().getCurrentBindingsEntry();

                    // get an ADF attributevalue from the ADF page definitions
                    AttributeBinding attr = (AttributeBinding)bindings.getControlBinding("SelectedLabel1");
                    // and store the label there
                    attr.setInputValue(csi.getLabel());
                }
            }
        }
        //show the popup
        RichPopup.PopupHints hint = new RichPopup.PopupHints();
        getRadioPopup().show(hint);
    }

The images below showing the changes application

You can download the workspace from the ADF EMG Sample Project BlogTestRadiobutton.zip. The sample uses the HR DB schema (even as this is not really needed for the sample).

JDeveloper: Navigation after Return from Bounded Task Flow

A question on the OTN JDeveloper and ADF ‘Space’ asked for a sample and/or tutorial on how to navigate after a bounded task flow, based on pages, returns from its work.
I setup a sample application to show how this works. The application is built using JDeveloper 11.1.1.7.0 and uses the HR DB schema. The sample can be loaded using the link provided at the end of the post.
Before we start let’s take a look at the running application:


Now that we have seen how the application works let’s check out how it’s implemented.

We start with an unbounded task flow (adfc-config.xml) which look like

Unbounded Task Flow: adfc-config.xml

Unbounded Task Flow: adfc-config.xml


We see that the application is built from two pages, a ‘Start’ page and an ‘End’ page. The ‘Start’ page can call a bounded task flow employee-btf. The start page holds one button ‘Start’ which calls the bounded task flow which is shown below.

Bounded Task Flow: employee-btf.xml

Bounded Task Flow: employee-btf.xml

This task flow shows a table of employees and allows to navigate to a detail page where the employee data can be changed. Depending on the result of the change, we navigate back to the start page (when the rollback button is clicked) or we navigate to the ‘end’ page if the changes are committed (using the commit button). The buttons are calling the navigation case named ‘start’ or ‘end’ which are task flow return cases which are looking like

Task Flow Return: Start

Task Flow Return: Start

or

Task Flow Return: End

Task Flow Return: End

As you see the return for ‘start’ calls a parent navigation ‘start’ which is implemented using a ‘wild card’ navigation ‘*’. Same is true for ‘end’ task flow return call. Once the navigation is given back to the parent task flow, it looks for a navigation with the name of the outcome ‘start’ or ‘end’ and executes the navigation.

The sample can be loaded from the ADF EMG Samples workspace BlogUBTBTFNavigation.zip

Case Study: Backporting a JDeveloper Project from11gR2 to 11gR1

I got a couple of queries to backport my file and image handling sample, which was built using JDeveloper 11.1.2.x version, to JDeveloper 11.1.1.x version. This I have done and like to share the steps on how to do this.

Here are the general steps:

  1. copy the workspace from 11gR2 into a fresh folder which you should onöy access with 11gR1. It’s essential to don’t open one workspace with different workspaces as this might change descriptors and or files.
  2. open the ‘.jsw’ file in 11gR1. If you get a message if you want to migrate answer ‘yes’
  3. recompile the model project.
  4. make the necessary changes to the viewController project files: ui pages and descriptors
  5. Test the application

As base for this case study we use the sample BlogUploadDownloadV2.zip which is the final sample from the Part 3.

1) unzip the sample into a fresh folder. We use the same folder names from the zip archive, but use a different base directory (backport in this case)
2) The images below show the steps to take after copying the files into the backport folder and opening the ‘.jws’ file. Don’t be fooled by the wizard which tell you that the files are converted from jsf1.0 to jsf1.2. Somehow hte wizard only knows that that the files are not jsf1.2 so it assumes that they are jsf1.0.

3) The database project don’t need any attention. The model project can just be recompiled. Here are the last lines after the rebuild. If you like you can test application module using the application module tester

...
Validating Business Component: de.hahn.blog.uldl.model.businessobjects.Catalog
  copying de/hahn/blog/uldl/model/businessobjects/Catalog.xml to output directory
Updated file:/Q:/backport/BlogUploadDownload/ULDLModel/classes/META-INF/adfm.xml
[7:11:42 PM] Successful compilation: 0 errors, 0 warnings. 

4) Now we have to make some obvious changes to the ViewController project. Fist we have to check if the ui pages are built using JSPX pages of JSF pages. A look into the public_html folder reveals that there is only one page (Catalog.jsf) which was built as JSF page. In a first step we rename the file to Catalog.jspx. Fragments have the suffix ‘.jsff’ in both versions, but are based on different schemas. However, we don’t need to rename the fragments.
Now we refresh the viewController project to see the new jspx file.

Refresh Project

Refresh Project


When we open the file we’ll see an error which is hte result that we tried to open a jsf (renamed only to jspx) page in 11gR1.
Error opening the Catalog.jspx

Error opening the Catalog.jspx


We ignore the error and continue our work. To fix the error we have to look into the file (source) and see that the jsf page uses a different root element:

<f:view xmlns:f="http://java.sun.com/jsf/core" xmlns:af="http://xmlns.oracle.com/adf/faces/rich">

whereas a jspx page uses

<jsp:root xmlns:jsp="http://java.sun.com/JSP/Page" version="2.1" xmlns:f="http://java.sun.com/jsf/core" xmlns:h="http://java.sun.com/jsf/html"
          xmlns:af="http://xmlns.oracle.com/adf/faces/rich">
  <jsp:directive.page contentType="text/html;charset=UTF-8"/>
<f:view xmlns:f="http://java.sun.com/jsf/core" xmlns:af="http://xmlns.oracle.com/adf/faces/rich">

After changing this root element and adding the close tag, the whole page look like

<?xml version='1.0' encoding='UTF-8'?>
<jsp:root xmlns:jsp="http://java.sun.com/JSP/Page" version="2.1" xmlns:f="http://java.sun.com/jsf/core" xmlns:h="http://java.sun.com/jsf/html"
          xmlns:af="http://xmlns.oracle.com/adf/faces/rich">
    <jsp:directive.page contentType="text/html;charset=UTF-8"/>
    <f:view xmlns:f="http://java.sun.com/jsf/core" xmlns:af="http://xmlns.oracle.com/adf/faces/rich">
        <af:document title="Catalog.jspx" id="d1">
            <af:form id="f1" usesUpload="true">
                <af:panelStretchLayout topHeight="50px" id="psl1">
                    <f:facet name="top">
                        <af:outputText value="Upload Download Test" id="ot1" inlineStyle="font-size:xx-large;"/>
                    </f:facet>
                    <f:facet name="center">
                        <af:region value="#{bindings.catalogtaskflowdefinition1.regionModel}" id="r1"/>
                        <!-- id="af_one_column_header_stretched"  -->
                    </f:facet>
                </af:panelStretchLayout>
            </af:form>
        </af:document>
    </f:view>
</jsp:root>

We still see red marks in the right side gutter of the file. These are because we have not jet changes the libraries used by the project. After removing the JSF2.0 library we use the ‘Code Assist’ function of JDeveloper to add the correct JSF1.2 tag libs and libraries.


You may have to close JDeveloper and reopen it again to get rid of the red marks. After this you can open hte Catalog.jspx file in design mode:
Migrated Catalog.jspx

Migrated Catalog.jspx


The next step is to look into the ‘.jsff’ fragments. These too are using a different schema. This is the JSF2.0 fragment which uses a tag:

<?xml version='1.0' encoding='UTF-8'?>
<ui:composition xmlns:ui="http://java.sun.com/jsf/facelets"
                xmlns:af="http://xmlns.oracle.com/adf/faces/rich"
                xmlns:f="http://java.sun.com/jsf/core">

The JSF1.2 fragment uses a jsp:root element instead:

<?xml version='1.0' encoding='UTF-8'?>
<jsp:root xmlns:jsp="http://java.sun.com/JSP/Page" version="2.1" xmlns:af="http://xmlns.oracle.com/adf/faces/rich" xmlns:f="http://java.sun.com/jsf/core">

Changing the ui:component tag to the jsp:root tag (don’t forget to change the end tag) the fragments can be opened in design mode too. Depending on the components you have used in your may have to change some ui components to get your page to work.
Next step is to adjust the Databindings.cpx which still holds a link to the Catalog.jsf page.

Old Databindings.cpx

Old Databindings.cpx


Open the file in source mode and change the ‘Catalog.jsf’ to ‘Catalog.jspx’. Next we have to check the ‘adfc-config.xml’ which holds a reference to the ‘Catalog.jsf’ page. This we change to ‘Catalog.jspx’.
Now we are ready to try to run the backported app the first time. We check the DB connection first, then run the application.

<20.05.2013 20:58 Uhr MESZ> <Error> <J2EE> <BEA-160197> <Unable to load descriptor P:\jdeveloper\system\system11.1.1.7.40.64.93\o.j2ee\drs\BlogUploadDownload/META-INF/weblogic-application.xml of module BlogUploadDownload. The error is weblogic.descriptor.DescriptorException: Unmarshaller failed
	at weblogic.descriptor.internal.MarshallerFactory$1.createDescriptor(MarshallerFactory.java:161)
	at weblogic.descriptor.BasicDescriptorManager.createDescriptor(BasicDescriptorManager.java:323)
	at weblogic.application.descriptor.AbstractDescriptorLoader2.getDescriptorBeanFromReader(AbstractDescriptorLoader2.java:788)
...
	at weblogic.work.ExecuteThread.run(ExecuteThread.java:178)
Caused by: com.bea.xml.XmlException: weblogic.descriptor.BeanAlreadyExistsException: Bean already exists: "weblogic.j2ee.descriptor.wl.LibraryRefBeanImpl@eadc995c(/LibraryRefs[[CompoundKey: adf.oracle.domain]])"
	at com.bea.staxb.runtime.internal.util.ReflectionUtils.invokeMethod(ReflectionUtils.java:54)
	at com.bea.staxb.runtime.internal.RuntimeBindingType$BeanRuntimeProperty.setValue(RuntimeBindingType.java:539)
...

This error points to one of the descriptors we did not check up to now. The ‘/LibraryRefs[[CompoundKey: adf.oracle.domain]]’ is defined in the weblogic-application.xml file which we find ‘Application Resources’->’Descriptors’->’META-INF’ node.

weblogic-appliaction.xml

weblogic-appliaction.xml


Here we see that there are multiple entries for the same listeners and library-ref entries. These entries are getting duplicated each time you open the project (or restart JDeveloper). The reason for this is that the ‘xsi:schemaLocation’ is pointing to the wrong version ‘1.1’ (and location) in this case. The correct version for the 11gR1 is ‘1.0’. We replace the wrong schema with the correct one and remove the duplication entries.

<weblogic-application xmlns:xsi="http://www.w3.org/2001/XMLSchema-instance"
                      xsi:schemaLocation="http://www.bea.com/ns/weblogic/weblogic-application http://www.bea.com/ns/weblogic/weblogic-application/1.0/weblogic-application.xsd"
                      xmlns="http://www.bea.com/ns/weblogic/weblogic-application">

Before we run the application again we check need to check the web.xml which contains a couple of entries which are not needed using 11gR1.
There ‘context-param’s javax.faces.PARTIAL_STATE_SAVING, oracle.adf.view.rich.security.FRAME_BUSTING, javax.faces.FACELETS_VIEW_MAPPINGS, javax.faces.FACELETS_SKIP_XML_INSTRUCTIONS, javax.faces.FACELETS_SKIP_COMMENTS, javax.faces.FACELETS_DECORATORS and javax.faces.FACELETS_RESOURCE_RESOLVER should be removed.
After these changes the application is ready to run.
5) Test run the application

Running Backported Application

Running Backported Application

If you like to use hte new skyros skin you neet to alter the trinidad-config.xml to:

<?xml version="1.0" encoding="UTF-8"?>
<trinidad-config xmlns="http://myfaces.apache.org/trinidad/config">
  <skin-family>skyros</skin-family>
  <skin-version>v1</skin-version>
</trinidad-config>

The last things to check is the ‘transaction isolation level’ of the task flows and the ‘ChangeEventPolicy’ of the iterators. The default ‘ChangeEventPolicy’ has been changed for 11gR2 applications to ‘ppr’ whereas it was ‘none’ for 11gR1. This change might not be visible at first, but you may notice some flicker in the table of the sample. This is the result of the new ‘ChangeEventPolicy’. If you check it back to none, you have to app the partial triggers to the components yourself. This is done in the sample which comes with Part 4 of the file and image handling sample.

There sure are more things to change, which I did not mention. This is because I did not need to change them ot did not find them. If you come across suhc a missing thing, please drop me a note so that I can add this to this article.

Master Detail Insert/Delete Sample

In the last couple of weeks a question on the OTN JDeveloper & ADF forum about how to insert and delete in a master-detail szenario was asked frequently. There are some threads in the forum talking about this, but apparently no solution which answers all the questions. This post tries to fill in the gap.

Use case
The use case we implement in this blog is as follows: we have a master detail relationship defined by a foreign key in the detail table. We use the REGION and COUNTRIES tables of the HR DB schema. There is a 1..* relationship between the REGION and the COUNTRIES tables. When you look at the REGIONS table only four regions are defined. We want to be able to create a new region and add some new countries into the detail table COUNTRIES before committing the whole transaction. Likewise we want to delete a region together with the countries attached to it, but also a country by itself without deleting a region.

Implementation
The insert part is pretty simple as the ADF framework does it automatically for you. You only have to use the right view objects from the data control and the framework does all the magic of propagating the FK to the child table when you insert a new row into the child table. This even works if you just added a new row to the master without committing it before inserting new child records.
The cascading delete part is not as obvious as the framework offers some help, but delegates the real work to the DB. If the DB knows about the cascading delete it works out OK. However, when you build the business components from the DB tables, the framework does not tell the DB that you want the cascading delete to happen. So without a small change the use case won’t work without us manually deleting all child rows ourselves.

In this blog we build a sample which shows how this use case can be implemented with the help of the DB. In an OTN Harvest post What happens when you choose cascade delete on an association Frank Nimphius talked about what it means if we choose the cascade delete option on an association. Here is a quote from the article:


One of the configuration options in the visual editor is Implement Cascade Delete that is located in the
Relationship menu under the Behavior header. Selecting this option indicates that all detail rows that are
associated with a parent entity should be deleted when the parent entity is deleted.
However, ADF Business Components does not itself perform the cascade delete, but expects a database
constraint to be defined for this. All that the Implement Cascade Delete does is to change the delete
command issued by ADF Business Components to the database.
To quote the “Oracle Fusion Middleware Fusion Developer’s Guide for Oracle Application Development
Framework”

” … When selected, this option allows the composing entity object to be removed unconditionally together with any composed
children entities. If the related Optimize for Database Cascade Delete option is deselected, then the composed entity objects
perform their normal DELETE statement at transaction commit time to make the changes permanent. If the option is
selected, then the composed entities do not perform the DELETE statement on the assumption that the database ON
DELETE CASCADE constraint will handle the deletion of the corresponding rows.

In summary, the article tells us what to do to make the cascading delete work. We need to make the foreign key constraint aware of that by setting it’s delete action to ‘CASCADE’. This we can do from within JDeveloper by using the DB Navigator. Open the HR connection and then open the ‘Tables’ node. Here we select the COUNTRIES table and edit it:

Change FK Constraints on the DB Table COUNTRIES

Change FK Constraints on the DB Table COUNTRIES


Select ‘CASCADE’ in the ‘On Delete’ drop down box in the Foreign Key dialog box:
Set Constraint to CASCADE

Set Constraint to CASCADE


After this change the rest of the use case is just setting up the UI.

Setting up the UI
First we take a look at the ‘Data Controls’ where we see the master detail relationship between the Regions and Countries:

Data Controls

Data Controls


The UI is build in on fragment ‘SchowMasterDetail.jsff’ which consists of a vertical splitter. In the upper part we put the master (Region) as a form and in the bottom part the detail (Countries) as editable table.

<?xml version='1.0' encoding='UTF-8'?>
<jsp:root xmlns:jsp="http://java.sun.com/JSP/Page" version="2.1" xmlns:af="http://xmlns.oracle.com/adf/faces/rich" xmlns:f="http://java.sun.com/jsf/core">
  <af:panelStretchLayout id="psl1">
    <f:facet name="center">
      <af:panelSplitter id="ps1" orientation="vertical" splitterPosition="150">
        <f:facet name="first">
          ...
        </f:facet>
       <f:facet name="second">
         ...
       </f:facet>
      </af:panelSplitter>
      <!-- id="af_one_column_stretched"   -->
    </f:facet>
    <f:facet name="bottom"/>
  </af:panelStretchLayout>
</jsp:root>

To get the master data into the form we drag the Region view object from the data controls on the first splitter facet and drop it as form with submit and navigation buttons. After this we add another panelGroupLayout where we put some additional buttons which we use to create a new region, delete a region, rollback the changes and commit the changes.

For the detail we use the Countries view object from the data controls and drop it as table (editable) on the center facet of a panelStretchLayout which we put on the second facet of the panelSplitter. We mark the table singe selection and sortable. As we did for the regions we add some buttons to the bottom facet which we use to create a new country, delete a country, rollback the changes or commit them. Rollback and commit are for the whole transaction. Even if we click the rollback in the detail part, the whole transaction is rolled back.

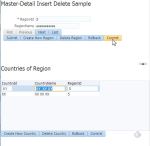
Final Page Layout

Final Page Layout


The image above shows the final page layout. Only two things are left to do. We change to the bindings tab of the ShowMasterDetail.jsff and set the ‘ChangeEventPolicy’ for both iterators (Region and Countries) to ‘ppr’. This spares us to update the input fields and the table after each click on one of the navigation buttons. If you are using 11.1.1.7.0 or 11.1.2.x this is the default for newly created iterators. For older versions you have to do it yourself.
Set ChangeEventPolicy to PPR

Set ChangeEventPolicy to PPR

Set ChangeEventPolicy to PPR

Set ChangeEventPolicy to PPR


Running Application
The images below are showing the running sample. We start by verifying that no countries for attached to region id 5 are present, then create a new region with the id 5. Without committing the new region we create some new countries for the fresh created region 5. Finally we commit the transaction and verify that the new data is present in the DB.

Now we delete the new region 5 with all countries created.

The sample was built using JDeveloper 11.1.1.7.0 and uses the HR DB schema. It should be work with JDeveloper 11.1.1.5.0, 11.1.1.6.0 and JDeveloper 11.1.2.3.0 too. You can download the sample from the ADF-EMG Sample Project ‘BlogMasterDetail.zip’

Make Disclosed Row the Current Row when using a Detail Facet of a Table

A question on the OTN JDeveloper & ADF forum asked for help on a use case using a table with an active detail facet. The problem is that when you disclose a row to see the detail, the current row is not changing to the disclosed row.

To make this work we add a RowDisclosureListener where we get the row which should be disclosed and make the row the current row.

The sample, which you cam download using the link provided at the end of the post, uses the HR schema. The master table show the employees and the detail facet is used to show details of the current job the employee has.

Running Application

Running Application


The data model looks like
Data Model

Data Model


The tabel is build by dropping the Employees table onto a page as read only table. The detail facet is build by dropping the JobsDetail as read only form onto the facet. The resulting page code looks like

        <af:table value="#{bindings.Employees.collectionModel}" var="row" rows="#{bindings.Employees.rangeSize}"
                  emptyText="#{bindings.Employees.viewable ? 'No data to display.' : 'Access Denied.'}" fetchSize="#{bindings.Employees.rangeSize}"
                  rowBandingInterval="0" selectedRowKeys="#{bindings.Employees.collectionModel.selectedRow}"
                  selectionListener="#{bindings.Employees.collectionModel.makeCurrent}" rowSelection="single" id="t1"
                  rowDisclosureListener="#{ShowEmployees.rowDiscloseListener}">
...
          <f:facet name="detailStamp">
            <af:panelFormLayout id="pfl1" partialTriggers="::t1">
              <af:panelLabelAndMessage label="#{bindings.JobId.hints.label}" id="plam3">
                <af:outputText value="#{bindings.JobId.inputValue}" id="ot10"/>
              </af:panelLabelAndMessage>
              <af:panelLabelAndMessage label="#{bindings.JobTitle.hints.label}" id="plam1">
                <af:outputText value="#{bindings.JobTitle.inputValue}" id="ot7"/>
              </af:panelLabelAndMessage>
              <af:panelLabelAndMessage label="#{bindings.MinSalary.hints.label}" id="plam2">
                <af:outputText value="#{bindings.MinSalary.inputValue}" id="ot8">
                  <af:convertNumber groupingUsed="false" pattern="#{bindings.MinSalary.format}"/>
                </af:outputText>
              </af:panelLabelAndMessage>
              <af:panelLabelAndMessage label="#{bindings.MaxSalary.hints.label}" id="plam4">
                <af:outputText value="#{bindings.MaxSalary.inputValue}" id="ot9">
                  <af:convertNumber groupingUsed="false" pattern="#{bindings.MaxSalary.format}"/>
                </af:outputText>
              </af:panelLabelAndMessage>
            </af:panelFormLayout>
          </f:facet>

The problem now is, that if we click on the disclose arrow on the left hand side we see the detail information of the current employee row (the master row). The disclosure of a row doesn’t set the current row to the disclosed row.
The solution is to make the disclosed row the current row. For this we add a rowDisclosureListener to the table which points to a method in a bean. The code of hte listener look like

    /**
     * Disclosure event
     * @param rowDisclosureEvent
     */
    public void rowDiscloseListener(RowDisclosureEvent rowDisclosureEvent) {
        RowKeySet addedSet = rowDisclosureEvent.getAddedSet();
        Object object = rowDisclosureEvent.getSource();
        // iterate over the disclosed row (hopefully only one)
        for (Object obj : addedSet) {
            List<Key> rowKeys = (List<Key>)obj;
            // make the disclosed row the current row
            this.makeDisclosedRowCurrent(rowDisclosureEvent,
                                         (Key)rowKeys.get(0));
        }
    }

    /**
     * Synchronizes the table UI component row selection with the
     * selection in the ADF binding layer
     * @param rowDisclosureEvent event object created by the table
     * component upon row selection
     */
    public static void makeDisclosedRowCurrent(RowDisclosureEvent rowDisclosureEvent,
                                               Key key) {
        RichTable _table = (RichTable)rowDisclosureEvent.getSource();
        //the Collection Model is the object that provides the
        //structured data
        //for the table to render
        CollectionModel _tableModel = (CollectionModel)_table.getValue();
        //the ADF object that implements the CollectionModel is
        //JUCtrlHierBinding. It is wrapped by the CollectionModel API
        JUCtrlHierBinding _adfTableBinding =
            (JUCtrlHierBinding)_tableModel.getWrappedData();
        //Acess the ADF iterator binding that is used with
        //ADF table binding
        DCIteratorBinding _tableIteratorBinding =
            _adfTableBinding.getDCIteratorBinding();

        //get the row key from the added rowdisclosure event
        Key _rwKey = key;
        _tableIteratorBinding.setCurrentRowWithKey(_rwKey.toStringFormat(true));
    }

The method rowDiscloseListener is used to get the key of the disclosed row and the method makeDisclosedRowCurrent is used to make the row the current row and synchronise the binding layer to reflect this.

You can download the sample thos the ADFEMG Sample side BlogTableDetail.zip
The sample uses the HR schema and was built with JDev 11.1.1.7.0 but works works with 11.1.1.4.o and higher too.

Using one ViewObject for Global Lookup Data (Part 2)

Based on the other post ‘Using one ViewObject for Global Lookup Data’ I got an other question on how to use this approach in a way, that a LOV is initalized with an area of lookup data before the page in shown to the user.
This can be done, all declarative without the need to write java code e.g. in an onLoad() method. The solution is to use a bounded task flow which initializes the LOV before navigation to the page the LOV is used.
To show this we create a simple navigation model in the adfc-config.xml like

Navigation Model

Navigation Model

‘Generic Lookup’ is used to show how to do this inside a page, where the lookup is presented in a region, the ‘LookupInitPosition’ shows how to preset an area for the lookup data (POSITION in this case) before showing the page in a region too.
Before we go into detail on how to setup the UI we need to add another view object to our data model which we use the acquire the lookup data

VO to get Lookup Data

VO to get Lookup Data


The ‘GeneralLookup’ view object is the same we used in part 1 to get the lookup data of an area, only this time we don’t specify lookup area but a dummy value (‘1’ in this case) for the area. This dummy value is set so that we don’t get any result back. If the ‘GeneralLookup’ view is executed without an area given from the outside, we don’t get any result. Keep this in mind when we are looking at the running sample later on.

Back to the UI. As both use cases uses a region it’s a nice sample how a bounded task flow (btf) can be reused in different use cases. The bounded task flow itself looks like

Navigation Model Bounded Task Flow

Navigation Model Model Bounded Task Flow

Bounded Task Flow to Show preselected Lookup Data

Bounded Task Flow to Show preselected Lookup Data


As you see the bounded task flow uses a method call (ExecuteWithParams) as it’s start activity. A task flow parameter is used to pass the name of the lookup area we want the LOV to initially show.
The name of the input parameter does not really matter, what you have to note down is the value part ‘#{pageFlowScope.selectedType}’ as this is the the variable we use to set the bindType parameter of the method call activity ExecuteWithParams.

Setup of the ExecuteWithParams Method Call

Setup of the ExecuteWithParams Method Call

After executing the query with the new set bindType we navigate to to page to show the result:

Region View1 which shows the LOV with the Preselected Lookup Data

Region View1 which shows the LOV with the Preselected Lookup Data


We see the LOV as af:selectOneChoice which stores the selected value in an attribute from the variable iterator (see Creating Variables and Attribute Bindings to Store Values Temporarily in the PageDef for more info on this). The input text below the LOV can be used to change the area parameter used for the LOV. If we enter e.g. WEEKDAY and click the ‘Refesh’ button, the input value is read and transferred to the parameter (#{pageFlowScope.selectedType}) for the executeWithParameter method via a af:setPropertyListener. This allows to change the LOV on the fly from within the region.
The LOV source is a dynamic list generated from the Generallookup VO as seen in the next image
Setup LOV for af:selectOneChoice

Setup LOV for af:selectOneChoice

After we know how the region (the bounded task flow) works, we can build the GenericLookup.jspx page. This page allows to enter the name of an ares into an input text field and then to refresh the bounded task flow, which we put on the page as region.

The final use case is to navigate to a page with with a preselected lookup area, POSITION in this case. For this we use the button ‘goto Page with init on POSITION’ at the bottom of the page.

You can download the sample workspace which was build JDeveloper 11.1.1.7.0 and using the HR schema from the ADF EMG Samples side BlogStaticVOLov_V3.zip. You can open the workspace using JDev 11.1.1.6.0 without a problem. If you are asked if you like to migrate the workspace to 11.1.1.6.0 answer with Yes.

Installing JDeveloper 11.1.1.7.0 from the Generic Installer Jar on 64bit Windows System

If you have installed JDev 11.1.1.7.0 lately, which I strongly recommend, you may have noticed, that the windows installer jdevstudio11117install.exe still ships with jdk160_24. Please don’t ask why Oracle don’t includes a JDk 1.7, I don’t know.
Well, it’s time to use JDK1.7 on my WIn7x64 system so I loaded hte jdevstudio11117install.jar which is a lot bigger (1.9GB) but comes without a bundeld JDK. As I have already installed JDK 1.7.0_17 on my system I pointed the installation to this jdk when I asked during the installation.
Everything went smooth and i took only a couple of minutes to install JDev and generate the embedded WLS 10.3.5 instance.

However, when I tried to start the embedded WLS instance I got the following error message

*** Using port 7101 ***
r:\jdeveloper\system\system11.1.1.7.40.64.93\DefaultDomain\bin\startWebLogic.cmd
[waiting for the server to complete its initialization...]
.
.
JAVA Memory arguments: -Xms256m -Xmx512m
.
WLS Start Mode=Development
.
CLASSPATH=...
.
PATH=...
.
***************************************************
*  To start WebLogic Server, use a username and   *
*  password assigned to an admin-level user.  For *
*  server administration, use the WebLogic Server *
*  console at http:\\hostname:port\console        *
***************************************************
starting weblogic with Java version:
<strong>Error: Could not create the Java Virtual Machine.
Error: A fatal exception has occurred. Program will exit.
Unrecognized option: -jrockit</strong>
Starting WLS with line:
...
Process exited.

Hm, ‘Unrecognized option: -jrockit‘, how’s that? I’m running Sun JDK!
Right at the beginning of the server start we see the command used to start the server (the path may be different on your system)
r:\jdeveloper\system\system11.1.1.7.40.64.93\DefaultDomain\bin\startWebLogic.cmd
A look into this command shell reveals that another command shell script is called
r:\jdeveloper\system\system11.1.1.7.40.64.93\DefaultDomain\bin\setDomainEnv.cmd
In this script we find the problem

...
set BEA_JAVA_HOME=C:\Program Files\Java\jdk1.7.0_17

set SUN_JAVA_HOME=


if "%JAVA_VENDOR%"=="Oracle" (
	set JAVA_HOME=%BEA_JAVA_HOME%
) else (
	if "%JAVA_VENDOR%"=="Sun" (
		set JAVA_HOME=%SUN_JAVA_HOME%
	) else (
		set JAVA_VENDOR=Oracle
		set JAVA_HOME=C:\Program Files\Java\jdk1.7.0_17
	)
)
...

As you see hte BEA_JAVA_HOME is set and if you put an
echo %JAVA_VENDOR%
before the if statement you see that the vendor is null. This sets the JAVA_HOME correct, but sets the JAVA_VENDOR to ‘Oracle’. This then adds the wrong option -jrockit to the command line later on in the startWebLogic.cmd script.

Now that we know that the solution is to make a small change to the
r:\jdeveloper\system\system11.1.1.7.40.64.93\DefaultDomain\bin\setDomainEnv.cmd
script. We only have to set the SUN_JAVA_HOME and set the JAVA_VENDOR to ‘Sun’

set BEA_JAVA_HOME=

set SUN_JAVA_HOME=C:\Program Files\Java\jdk1.7.0_17
set JAVA_VENDOR=Sun

After this change the embedded WLS server starts without a problem.

JDev 11.1.1.7.0: Table Pagination: Beware of the Layout Container

As you might have noticed, JDeveloper 11.1.1.7.0 brought the pagination feature for tables back. Looks a bit different than the old style, but is available again.
When I tested the paging of table I stumbled upon some interesting stuff. Luc Bors (ADF 11.1.1.7 : The return of the paging table (… and more ….)) and Andrejus Baranoski (ADF 11g PS6 – ADF 10g Table Pagination Feature is Back Finally) posted samples using the new pagination feature. However, when I tried it out at first, the pagination did not show up.

First Try: No Pagination

First Try: No Pagination

I checked the settings

  • scrollPolicy=’page’ (yes, this is a new attribute for the table component)
  • autoHeightRows=’0′

But they were set correct. Then I found the message

falling back to scrolling mode since we need parent component to flow and authHeightRows=0

in my log window and things cleared up.

Log Messages

Log Messages

As Luc wrote in his article, you have to put the table in a layout container in flow mode. This I did not (I read it but did not pay attention at first). To say it again, to make pagination work, the table has to be in a layout container in flow mode. This can e.g. a panelGroupLayout or a showDetailHeader.

If you look into the tag doc of the af:table component, the section

Geometry Management

  • This component can be stretched by a parent layout component that stretches its children, e.g. panelStretchLayout.
  • When stretching this component, the only valid setting for autoHeightRows is “-1” (a value of 0 will be treated as -1 when stretched).
  • When NOT stretched, autoHeightRows=”0″ can be used to size the height to the fetch size, which is similar to dimensionsFrom=”children”. Please refer to ‘autoHeightRows’ attribute for more information.
  • This component does not stretch its children.

If the oracle.adf.view.rich.geometry.DEFAULT_DIMENSIONS context-param is set to “auto” in the project’s web.xml, and the autoHeightRows value is set to 0, or is not set, the AFStretchWidth style class will be rendered for this component.

It’s not described clearly in the doc, but as you have to set autoHeightRows=0 to make pagination work, you can’t put a table in paging mode in a layout container in stretch mode. After changing the page, or better adding a new page with a layout container in scroll mode (here a panelGroupLayout) the pagination showed up:

Table with Pagination

Table with Pagination

You can download the sample from ADF EMG Samples page. The sample uses JDeveloper 11.1.1.7.0 and the HR DB schema.

JDeveloper 11.1.1.7.0 about to go public

First signs of the new version of JDeveloper 11.1.1.7.0 are popping up on the web.
Edwin Biemond, Luc Boer and Wilfried vander Deijl posted some new features and components like code editor, new DVT components, and new SOA stuff.
I like to point out a feature we, or at least me, where waiting on for a long time:
inputFile in multi file mode

Multi File Upload in Action

Multi File Upload in Action


this comment allowed uploading multiple file at once using a nice modern looking canvas.
As there is no official download available on the official JDeveloper page at the time of writing, you can
explore the new components and features using the Component demo yourself.
This new version looks very promising. Can’t wait to install it and try out some of the new stuff like InsertTextBehavior and Code Editor, even if I’m not  sure of a use case right now.
This will be a fun Easter weekend!

UPDATE 30-03-2013:
Look like there is no GIT support bundled in this (unofficial) version JDEVADF_11.1.1.7.0_GENERIC_130226.1400.6493