JDeveloper 12c: Save IDE Window Positions

A question on the ODC JDeveloper and ADF space about how to save a specific arrangement of the editor windows came caught my attention. After thinking about this a moment I could not think of any configuration to do this. ‘Reset Windows To Factory Setting’ is not what was asked for.

Idea

I wanted to figure this out and came up with the idea to make a snapshot of the current running JDeveloper folder, then change the editor window settings, take another snapshot and then compare them.

Solution

I did this with my current installation of JDeveloper 12.1.3.0.0, but it should work the same way in other JDeveloper versions. After comparing the two snapshots using KDiff3 it turned out, that the information about the size, position, and visibility of the editor windows are stored in a subfolder of the system12.1.3.x.xx.xxxxxx.xxxx folder named ‘system_cache/config/Preferences’.

This folder contains many subfolders holding information about your preference settings. To save the data make a copy of this folder and store it somewhere. If you messed up the IDE you can restore the windows by removing the current ‘system_cache/config/Preferences’ folder and restore it from the saved one.

Attention

Before you restore the settings you should close JDeveloper and make another copy of the current ‘system_cache/config/Preferences’ folder.

Adding missing extensions to JDeveloper 12.2.1.3

The current version of JDeveloper 12.2.1.3 is missing some extensions which are popular in the older version of JDeveloper. One of them, which is asked for a couple of times, is the MAF extension. Other extensions like ‘BI ADF ViewRegions’ are missing too.

Here are the images from the update page of JDeveloper 12.2.1.3

As you see, there is no ‘Mobile Extension’.

In general, you have two options to get the missing extensions installed:

  1. Download the extension from the ‘Extension Exchange’ and install it from a local file
  2. Add the ‘Extension Exchange’ to the known sources of extensions and load the extension right from JDeveloper

Personally, I prefer the second way as it only shows the extensions available for your version of JDeveloper. You can only install extensions which are configured for your version anyway.

Extension Exchange on the WWW

You’ll find all extensions available for all version of JDeveloper on the public ‘Extension Exchange’ at

http://www.oracle.com/technetwork/developer-tools/jdev/index-099997.html

From there you can download an extension and install it in JDeveloper from the local file. When you download an extension make sure to load the right version as you can only install extensions which are configured for your version (check the min and max version of the extension!).

Once you have an extension downloaded you can install it from this local file. As a sample show images how to install a MAF extension from a local file. As a sample, we’ll use JDeveloper 12.2.1.3.

Download the extension to your local file system and remember the folder you saved the file to. In JDeveloper go to menu ‘Help’->’Check for Updates’. Select ‘Install From Local File’ and search the file downloaded

Click finish and the extension gets installed.

If you try to install an extension which is not compatible to your JDeveloper version you get

So make sure you download the right version of an extension you like to install.

URL to add the ‘Extension Exchange’

To avoid the hassle of selecting the right version, let JDeveloper do this work for you. We simply add the URL of the ‘Extension Exchange’ to the ‘Update Centers’ and JDeveloper will search for extensions compatible to your JDeveloper version.

The URL we have to add is:

http://www.oracle.com/webfolder/technetwork/jdeveloper/downloads/1213center.xml

Open ‘Help’->’Check for Updates’ again and click the ‘Add’ button

Enter a name for the URL and the URL itself and click OK. Now, after clicking ‘Next’ you’ll get

and can select the ‘MAF Extension’ or any other missing extension right from the dialog. The installation is identical to the one shown in the ‘Extension Exchange on the WWW’ section.

DOAG DevCamp2016: Oracle Development Cloud Service Hands On (Part 4)

In part three of the series we completed the task to setup the build system in the DCS for the AppsCloudUIKit application. This final part of the series concludes with setting up the ‘Continuous Integration’ part of the application into the JCS.

Setting up the Continuous Integration to the JCS

The final task is to setup the continuous integration to the Java Cloud Service we use. This is done in the ‘Deploy’ tab where we create a ‘New Configuration’

We then fill in the needed data:

The Configuration name and the application name must match

Nest we select a deployment target. Here we can choose between a JCS and an Application Container Cloud depending on the type of application we develop. As we have created a web application using ADF we select the Java Cloud Service.

We can decide which type of deployment we like: on ‘Demand’ or’ Automatic’. Automatic means that after each build the deploy task is triggered. With the checkbox ‘Deploy stable builds only’ we tell the task to only deploy successful builds. If we choose ‘On demand’ we can select the build we like to deploy

To see the application running in the JCS we can use the URL AppsCloudUIKit (http://140.86.8.75/AppsCloudUIKit/faces/Welcome)

DOAG DevCamp2016: Oracle Development Cloud Service Hands On (Part 3)

In part two of the series we have moved the source of the application to the DCS GIT repository and covered the agile development capabilities of the Oracle Development Cloud Service. In this final part we show how to setup the continuous build service for the application.

To build the application in the DCS we have to create ANT build files or a Maven pom. We use ANT to build the project. To create a starting set of ANT build files we can use JDeveloper (New->Ant->BuildScript from Application). This will create two files, build.xml and build.properties. The build.xml file is the ANT build file and is not dependent on the environment. All environment dependent variables are put in the build.properties file. A sample of the created build properties look like

#Mon Feb 15 21:29:41 CET 2016
oracle.commons=R\:\\Java\\12.1.3.0.0\\Oracle\\Middleware\\oracle_common
install.dir=R\:\\Java\\12.1.3.0.0\\Oracle\\Middleware
oracle.jdeveloper.ant.library=R\:\\Java\\12.1.3.0.0\\Oracle\\Middleware\\jdeveloper\\jdev\\/lib/ant-jdeveloper.jar
oracle.home=R\:\\Java\\12.1.3.0.0\\Oracle\\Middleware\\jdeveloper
oracle.jdeveloper.workspace.path=Q\:\\JavaDevCloud\\DOAGDEVCAMP2016\\AppsCloudUIKit\\AppsCloudUIKit.jws
oracle.jdeveloper.deploy.profile.name=*
oracle.jdeveloper.deploy.dir=Q\:\\JavaDevCloud\\DOAGDEVCAMP2016\\AppsCloudUIKit\\deploy
oracle.jdeveloper.ojdeploy.path=R\:\\Java\\12.1.3.0.0\\Oracle\\Middleware\\jdeveloper\\jdev\\bin\\ojdeploy.exe
oracle.jdeveloper.deploy.outputfile=Q\:\\JavaDevCloud\\DOAGDEVCAMP2016\\AppsCloudUIKit\\deploy\\${profile.name}

We see that the generated properties are holding absolute path variables to programs like ojdeploy or the installation path of your local JDeveloper. We can use these two files to build the application locally without a problem. Working with the same properties, the absolute path variables, in the DCS will not work. The path from the local machine simply does not exist on the server. We need to make some changes to the properties file.

The goal is to use the ant build.xml and build.properties file in both environments with minimal changes. The less we lees to change the better. JDeveloper did some good ground work for us. The build.xml file have no dependency to the environment it’s running at. The save build.xml file can be used to run on the local environment and any server. All locations are either relative or are addressed with properties from the build.properties file.

The DCS offers two different environments (today), one for version 11.1.1.7.0 and one for version 12.1.3.0.0. The environments can be used by using environment variables which are preset for the server which is running the DCS. There are two ORACLE_HOME variables predefines env.ORACE_HOME_11G7 and env.ORACLE_HOME_12C3. Depending on which JDeveloper version we use to develop an application and which runs on the server we substitute the absolute path by one of the preset environment variables:

oracle.commons=R\:\\Java\\12.1.3.0.0\\Oracle\\Middleware\\oracle_common

changed to

oracle.commons=${env.ORACLE_HOME_12C3}\oracle_common =${env.ORACLE_HOME_12C3}

This we have to do with all absolute path variables we find in the build.properties file. We don’t even have to know the real path of the installation on the DCS, all we do is to use the predefined environment variables. Another thing to take care of is that the Hudson server which uses the build files run on a Linux machine whereas we normally use a Windows machine. In case that you run rue local development on a Linux machine too, you can skip the next paragraph.

Use the same build.xml and build.properties on Windows and Linux machines

There are some small but vital differences when running the development on Windows against running it on Linux.

  1. The path separator is different: ‘/’ in Linus, ‘\’ in windows
  2. Executables in windows have a suffix ‘.exe’

It would make sense to use the same build files on both machines. The path separator isn’t much of a problem as the ant tool manages reading Windows and/or Linux without a problem. To make the path separator work on both machines we use the Linux version in the build.properties. This can be done by a simple search and replace job.

The build properties contain one call to an executable ojdeploy. This is the packaging task JDeveolper uses to build jar, war and ear files. The name suggests that its use is to deploy something to a server, but that’s not what’s ojdeploy is doing. The problem is that Windows uses a suffix ‘.exe’ for executables, whereas Linux does not. Here an executable just has a flag set on the file properties. One solution would be to rename the ojdeploy on the Linux side to ‘ojdeploy.exe’, but for this we have to have access to the servers file system and the right to change this setting. We use a property which we define for the ant build job, ‘${env.EXEC_SUFFIX}’. The trick is to set the ‘${env.EXEC_SUFFIX}’ property to ‘.exe’ on a windows system and to ” (empty) on a Linux system.

On a Windows machine we define a system property for this

041516_1236_DOAGDevCamp1.png

On a Linux local system we can use an export command. For the Hudson build we use an ant property

Optimizing the build.properties for reuse

A close inspection of the original build.properties file shows, that we only need five properties to make the build.properties easy to handle for every project which we want to develop in the cloud and on a local environment.

  • workspace.name: holds the name of the workspace, in our case AppsCloudUIKit
  • project.viewcontroller.name: holds the name of the view controller project which is used to build the WAR file. The sample application uses the ‘DemoMaster’ project to create the WAR file.
  • project.deploy.folder: holds the folder where all artefacts are stored. This folder holds the final artefact, the EAR file.
  • oracle.jdeveloper.deploy.profile.name: The name of the application profile which builds the EAR file.
  • output.dir: holds the directory the build process uses to put the class files to.

The remaining properties don’t change as they use environment variables which will be set by the machine the build system is running on. In the cloud we have two environments (at the time of writing), one for 11g (11.1.1.7.1) and one for 12c (12.1.3). We use the 12.1.3 environment as our JCS uses 12.1.3 too.

The main environment variables are ‘${env.ORACLE_HOME_12C3}’, ‘${env.MIDDLEWARE_HOME_12C3}’, ‘${env.WORKSPACE}’ and finally ‘${env.EXEC_SUFFIX}’. All of them start with ‘env.’ which shows that they are read from the environment. To make ant aware of the environment variables we have to add one line to the generated build.xml at the beginning of build.xml

<property environment=”env” />

The final version can be seen below or downloaded at Ant build.properties

#Change the next properties to match your projects names
workspace.name=AppsCloudUIKit
project.viewcontroller.name=DemoMster
project.deploy.folder=deploy
oracle.jdeveloper.deploy.profile.name=AppsCloudUIKit
output.dir=classes

# Don't change anything below!
oracle.home=${env.ORACLE_HOME_12C3}
oracle.commons=${env.MIDDLEWARE_HOME_12C3}/oracle_common
middleware.home=${env.MIDDLEWARE_HOME_12C3}
install.dir=${env.ORACLE_HOME_12C3}

#Flags
javac.deprecation=off
javac.nowarn=off
java.debug=on
project.workspace.file=${workspace.name}.jws
oracle.jdeveloper.ant.library=${oracle.home}/jdev/lib/ant-jdeveloper.jar
oracle.jdeveloper.workspace.path=${env.WORKSPACE}/${workspace.name}.jws
oracle.jdeveloper.project.name=${project.viewcontroller.name}
oracle.jdeveloper.deploy.dir=${env.WORKSPACE}/${project.deploy.folder}
oracle.jdeveloper.ojdeploy.path=${env.ORACLE_HOME_12C3}/jdev/bin/ojdeploy${env.EXEC_SUFFIX}
oracle.jdeveloper.deploy.outputfile=${env.WORKSPACE}/${project.deploy.folder}/${oracle.jdeveloper.deploy.profile.name} 

Setting up the Build Job in the DCS

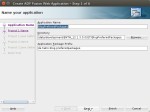
The next task it to set up the build job in the DCS. For this we create a new job

Give the job a name and can now select to create a new job or to copy an existing one. We select to create a new one

Now we configure the build job by filling in the needed information. On the main tab we can describe the job, decide which JDK to use and how many build job executions are saved. If you use a high number the space on your virtual storage is filling up quickly as all output and all artefacts are stored. We set this to 10.

We skip the next tab ‘Build Parameters’ and move to the ‘Source Control’ tab

As we use Git, we set the radio button to Git and select the repository of the project we want to build. The ‘Advanced Repository Settings’ are set automatically. In the ‘Branch Specifier’ field we can tell which branch we want to check out. Next we tell the build system when to start working

Here we select that we want to poll the source control system every minute for changes. The schedule uses the Linux ‘cron’ syntax. We skip the ‘Environment’ tab and define one build step on the ‘Build Steps’ tab

All we need to do is to execute the Appbuild.xml target ‘deploy’. This will compile all other needed projects and create the needed jars before finally creating the applications ear file. The remaining tab we leave unchanged and save the job configuration. In the ‘Properties’ field we see the definition of the ${env.EXEC_SUFFIX} variable mentioned before.

The ‘Post Build’ tab defines what to do with the outcome of the build. Here we define that the generated artifacts which end up in the ‘deploy’ folder should be archived in GZIP format. If we don’t do this the build runs but as nothing is saved, we later can’t deploy the ear file. The remaining tab ‘Advanced we skip and save the created job.

Now we can run the build job by clicking the ‘Build’ button. The job doesn’t start immediately but is queued first, then starts running.

… when the build starts we see the change in status.

We can look at the console output of the job by clicking the console icon of the running job. If you click on the console icon of a finished job you see the complete output.

Once the job has finished successfully the artifacts are shown with the build.

In the next and final part we see how to setup the ‘Continuous Integration’ part by deploying the application to the JCS.

DOAG DevCamp2016: Oracle Development Cloud Service Hands On (Part 2)

In part 1 of this series we talked about the Oracle Development Cloud Service (DCS) in general terms and what we plan to do. This part describes the migration of an application developed for an earlier version of JDeveloper to version 12.1.3 and how to move it into the cloud.

As a test case we use the sample application provided by the Rapid Development Kit which shows a sample on how to easily develop modern, scalable applications using the Alta UI. The image below shows the landing page of the application with the splash screen. The running application can be seen at http://140.86.8.75/AppsCloudUIKit/faces/Welcome

In Part 1 we already downloaded the source of the application, created the DCS project, assigned users to the project and initialized the GIT repository for the application in the DCS. The next step is to migrate the application which was designed using JDeveloper 11.1.1.9.0 to JDeveloper version 12.1.3 which we use in the DCS.

Before we start we checkout a new branch named ‘develop’ from the GTI repository. This allows us to work outside the ‘master’ branch. When we finished the migration we can merge the changes back to the master. This resembles the GIT Flow pattern (see ‘The Git Experience (Part 4)‘).

Migrating is as simple as to open the project in your local JDeveloper 12.1.3 and let JDeveloper do an automatic migration. There are some things which have to be changed in the sources as JDeveloper can’t do them automatically.

  1. We check the libraries used in each of the projects of the AppsCloudUIKit workspace. Make sure that there are no red marked libraries as this would mean that the library is not available in the current defined libraries. If we see one of those (e.g. JSF1.2 which is JSF2.1 in 12.1.3) we need to find an equivalent library for 12.1.3 and choose this instead.
  2. We compile each project and correct any errors we find in the compile window. There are some warnings which we let go for the moment. They tell us that the UI uses some tags or components which have been deprecated in JDeveloper 12.1.3. The components are still available but we should exchange them with the new components in the future. When we compile the projects we have to follow a specific order, the dependency of the project. There is a common project ‘UIKitCommon’ which is used in all other projects. This project holds the foundation of the application. Once the project compiles we have to create an adfLibrary from it which is used in the other projects. For this we right click on the project and select ‘Deploy’->’adflibUIKitCommon…’ and follow the instructions.
  3. We need to setup the data used for the application. The application doesn’t use a DB in this version. All data is created and served via POJO Java classes. All of them reside in the ‘DemoData’ project. We compile this project and create an ADF library from it like we did for the ‘UIKitCommon’ project.
  4. We compile and deploy (to adfLibrary) the other projects in this order: ‘DemoCRM’, ‘DemoHCM’, ‘DemoFIN’ and finally ‘DemoMaster’. The ‘DemoMaster’ project create an EAR File which can be deployed to a standalone server.

After this we can run the application in our local server integrated in JDeveloper and see if it works (see the image above). Once this is verified we save all changes in the GIT repository and push them to the cloud based remote GIT Repository. This is like working with any other remote GIT repository, no difference in usage. After this the landing page of the DCS project shows the trail of work as in the image below.

Using the collaboration features

One really nice thing about the DCS is the integrated collaboration features like a wiki page, an issue tracker like Jira and an agile board where we can plan sprints to track the progress of the project.

We create a wiki page to collect all decisions made during development and generating documentation this way. This will help members to understand the project and how they are supposed to work with the project. New members added to the project at a later point in time can use this wiki to understand the project and how to work with the team.

The image below show the start wiki page of the project

and add some basic information about the project. Later we add more info about who we changed the project and how to setup the build system.

The wiki supports cascading pages too. We add a page describing the build system to the project. This allows other team members to efficiently use the build system on the DCS. We talk about details of the build system and how to use it in the next part.

Agile Development

The DCS supports agile development. The tab ‘Agile’ opens a sprint planning view to the project. This is a very neat feature. Teams can use this to plan their tasks and track their progress. Here we can create issues (tasks, feature or issues) which first end up in the bag log. We can create sprints and assign the issues to sprints.

We can work like in e.g. Jira, we drag issues from the backlog to the sprint

to add the issue to the sprint

If you like you can change the agile board, e.g. add progress states

Finally we can start the sprint by defining the start and end date. Once a sprint is started we can look at the active sprint to see the tasks in their different states. This view allows drag & drop to make it easy to change the status of a task.

Once all tasks are finished we can complete the sprint.

A look at the ‘Issues’ tab shows the finished work.

All this works out of the box. As a teaser I added a couple of images from the DCS team feature when they are integrated in JDeveloper 12.2.1

When the DCS supports JDeveloper 12.2.1 the integration to the agile board and issue tracker is as simple as logging into the DCS. No hassle setting up a team server and all other needed software and their adapters.

This concludes the second part of the series. The next part reveals details about the build system.

DOAG DevCamp2016: Oracle Development Cloud Service Hands On (Part 1)

End of February the DOAG held its annual DevCamp in Bonn, Germany. One big part of the DevCamp was a session or better a couple of session about the Oracle Developer Cloud Service and how to use it.

This part shows some general information about the Oracle Cloud. In the next part we show how to migrate an existing application to the cloud and how to use some of the available tools of the Development cloud.

The Developer Cloud Service (DCS) was introduced last year and became available to the public around the OOW2015. It offers a whole toolset to allow development of applications in the cloud. The DCS is bundled with the Java Cloud Service (JCS) which is bundled with the Database Cloud Service (DBCS). There are a couple of other services like Storage Cloud Service , responsible for managing the disk storage needed, and Compute Cloud Service responsible for the security and firewall of all services used by a company. For more information see Fasten your seat belts: Flying the Oracle Development Cloud Service (1- Boarding).

All these services are working together. If you ever have setup a working Oracle environment consisting of a DB, a WebLogic Server, load balancer, ADF Runtime you know that this isn’t an easy task to accomplish. The good news is that this work is done automatically by Oracle provisioning the different services. You as a user or company have to make some decisions like which version of the DB you want to use, or which version of WebLogic Server to install and how many CPUs to use for each service. You can later upscale the number of CPUs or managed server you want to use in total for your system. All this is very flexible.

Why to use the DCS?

Well, as mentions before, setting up a development environment does take some time and hardware. Sometimes it hard to get the time from your admins to get the hardware and setup the software to get the full environment four your development. This is one reason I see at my customers for not upgrading to newer software versions. The department has to buy the hardware and software licenses, without knowing exactly which hardware parameters they later need. Once the evaluation is finished you have the hardware and software on stock without knowing if you really need them. After all it was an evaluation only.

Oracle Cloud Services (Platform as a Service or PaaS in short) allows you to buy or lease the needed hard and software to setup an evaluation stack. You can use the stack as long and you pay for it. You can up/down scale it to your needs. As a sample you can start with a small scale development environment (DB, WeblogicServer with one admin and one managed server) and later scale it up with a load balancer and multiple managed servers in a cluster.

Right now there are two different environments for development available to configure: 11g as JDev 11.1.1.7.0 and 12c as JDev 12.1.3. In a couple of weeks JDev 12.2.1 should be available too.

Depending on the size (RAM, storage or number of OCPUs) you can select ‘metered’ or ‘none metered’ services. For pricing information see https://cloud.oracle.com/en_US/java?tabID=1385147650676 for a sample for the JCS.

Installation or configuration of the DCS is not part of this document. Oracle Developer Cloud Service smoothly and invisibly integrates your development environment with the latest versions of other services in Oracle Cloud, such as Oracle Java Cloud Service and Oracle Database Cloud Service.

Another big plus is the fully integrated development life cycle which allows to create and administer the configurations for code repositories, continuous integration, testing, building, and deployment for all stages of the development.

Developer Cloud Hands On

The remainder of this document talks about the practical work with the DCS. We show which tools are provided and how to use them to setup a CI (Continuous Integration) environment. As a test case we use the sample application provided by the Rapid Development Kit which shows a sample on how to easily develop modern, scalable applications using the Alta UI. The sample was developed by Oracle Applications User Experience team to give developers a foundation to enhance the sample or use the code they like in their own application. The image below shows the landing page of the application with the splash screen. The running application can be seen at http://140.86.8.75/AppsCloudUIKit/faces/Welcome

The application comes with design guide as an e-book and hints on how to use and extend the sample. We start with downloading the source from the web page. The application was developed using JDev 11.1.1.9.0. In the DCS we use JDev version 12.1.3.

Before we start to use the DCS we copy the sources from the zip into a new empty directory. From this directory we start by first logging into the DCS and creating a new project, DevCamp16 in the image below.

The identity domain holds the service (multiple projects) and members who can access the DCS using different roles. Once we work with one of the project we can add members to the project, but first have to add them to the identity domain as users. For this document we are only using one administrator and multiple development users. The DCS administrator assigns new users to the DCS, the project administrator the members of the DCS to the project. A DCS member can be member in zero or many projects in different roles. This way one DCS can be used for different projects. Members of one project can be excluded from others. A member of the identity domain only sees projects he is a member of. This allows a fine grained project landscape.

The project is the development environment we or the team uses to develop an application. A project holds one or more GIT repositories to manage code, a Husdon build server to manage the builds of the software, an issue tracker (kind of Jira), a wiki which we user to document decisions we made during the development, a deployment section which we use to implement a CI environment and finally we get an agile board where we can plan the development (add issues, backlog and sprints).

The last tab we see is the ‘Administration’ tab which allows one or more members to act as the administrators of the project. An administrator can add other members to the project, manage their rights and even remove the project with all its artifacts. The UI is modern and build using JET with Alta UI Design. The image below shows the administration page of the project.

The image below shows the GIT (or more than one if we add more) and the one Maven repository.

In the next tab we get an overview about the project. This is more or less empty as there has not been much work done.

The final tab hold the information about the members of the project.

This concludes part 1. In part 2 we talk about how to migrate the application from the RDK to the DCS. We learn how to setup the build system and integrate with continuous integration service.

Fasten your seat belts: Flying the Oracle Development Cloud Service (3 – Take Off – ROTATE)

The last part of the series 3 – Take Off – V1 we finished when we could build hte application using ANT on the local machine. In this part we are going to try this on the Oracle Developer Cloud. Finally we should see how Continuous Integration and Continuous Delivery works in the cloud.

Alt NOTE
I created a fresh set of ANT build scripts named ‘buildlocal.xml’ and ‘buildlocal.properties’ from the project to demonstrate the process. The original ones name ‘build.xml’ and ‘build.properties’ are the final result which I didn’t want to revert. So when you create the ANT scripts yourself you can user the default names ‘build.xml’ and ‘build.properties’. When I talk about build files I now mean the ones named ‘buildlocal.*’.

Demo Build Files

Demo Build Files


For the same reason we create a new build job in the cloud names ADFTestBuild to show the steps to take. The final build job is named ADFCommunuityFrkExt.
Demo Build Job

Demo Build Job

We pushed the files local build files already to the remote repository. Let’s run the build on the could. First we log into the Oracle Developer Cloud as team member and switch to the build tab and create a new build job (ADFTestBuild)


Note that we use JDK 7 to build the project. The Oracle Developer Cloud offers JDK 6-8 to work with. As we use JDev 12.1.3 we use JDK 7
JDK's available

JDK’s available


In the Source Code Management section we select the repository and branch to use for this job. The advanced section can be left blank as it’s filled by the system when you save the job. There are more advanced option you can set but they are not part of this post. All we nach to remember

Alt NOTE
Builds are dependent on ONE branch

Alt NOTE
The Build Trigger defines that each minute the CI system checks the SCM if something has changed. If yes, it schedules to execute the build job.

When we are finished with the feature we have to change the build job or to create a new one which uses the master or default branch to build on. In our situation where we implement the CI we set the branch to the one we are working on named ‘feature-setup-build’.

After saving the new job we can start it by clicking on the ‘Run Now’ button


Hm, the build did not work as it did on the local machine. This is shown by the icon in the first column of the job history table. To find out what went wrong we look at the output of the build by clicking on the ‘console’ button in the last column of hte table
Build output

Build output


In the first marked section we see the build file ‘buildlocal.xml’ which was used and in the second marked section the error message. It looks liek the build job can’t find the task ‘OJDeployAntTask’. A look into the buildlocal.xml file at line 40 reveals

   <taskdef name="ojdeploy" classname="oracle.jdeveloper.deploy.ant.OJDeployAntTask" uri="oraclelib:OJDeployAntTask"
             classpath="${oracle.jdeveloper.ant.library}"/>

where line 40 is the classpath in the above listing. This means that the variable “${oracle.jdeveloper.ant.library}” is not found. A look into the Oracle Developer Cloud at Developing Oracle ADF Applications with Oracle Developer Cloud Service give the needed information. We have to alter the build files
1. add a line

<property environment="env"/>

to the build.xml file before loading the build.properties
2. change the build.properties file to use information from the now loaded environemnt
The second part is a bit confusing. From the link above we learn to set a variable as
oracle.home=${env.ORACLE_HOME}
which is misleading a bit. The problem is that the developer cloud offers two environments to the user. One for 11g and one for 12c. As we use the one for 12c we have to use a different setup which can be found in the docs too at a different location Using Hudson Environment Variables. The second link tells us to use
oracle.home=${env.ORACLE_HOME12C3}

Alt NOTE
Add property environment="env" to your build.xml to load the environment of the server
Alt NOTE
Add
oracle.home=${env.ORACLE_HOME_12C3}
oracle.commons=${env.MIDDLEWARE_HOME_12C3}/oracle_common
middleware.home=${env.MIDDLEWARE_HOME_12C3}
install.dir=${env.ORACLE_HOME_12C3}
to the build.properties file to make use of hte servers environment.

With this info we can make the needed changes. The resulting build.properties is

#Fri Jul 24 15:06:08 CEST 2015
#Change the next three properties to match your projects names
workspace.name=ADFCommunityFrkExt
workspace=${env.WORKSPACE}
project.viewcontroller.name=FrkExtModel
project.deploy.folder=deploy
oracle.jdeveloper.deploy.profile.name=adflibADFCommunityFrkExt
output.dir=classes

# Don't change anything below!
oracle.home=${env.ORACLE_HOME_12C3}
oracle.commons=${env.MIDDLEWARE_HOME_12C3}/oracle_common
middleware.home=${env.MIDDLEWARE_HOME_12C3}
install.dir=${env.ORACLE_HOME_12C3}

#Flags
javac.deprecation=off
javac.nowarn=off
java.debug=on

project.workspace.file=${workspace.name}.jws
oracle.jdeveloper.ant.library=${oracle.home}/jdev/lib/ant-jdeveloper.jar
oracle.jdeveloper.workspace.path=${workspace}/${workspace.name}.jws
oracle.jdeveloper.project.name=${project.viewcontroller.name}
oracle.jdeveloper.deploy.dir=${workspace}/${project.deploy.folder}
oracle.jdeveloper.ojdeploy.path=${env.ORACLE_HOME_12C3}/jdev/bin/ojdeploy${env.EXEC_SUFFIX}
oracle.jdeveloper.deploy.outputfile=${workspace}/${project.deploy.folder}/${oracle.jdeveloper.deploy.profile.name}

and the build.xml

<?xml version="1.0" encoding="UTF-8" ?>
<!--Ant buildfile generated by Oracle JDeveloper-->
<!--Generated Aug 22, 2015 3:15:37 PM-->
<project xmlns="antlib:org.apache.tools.ant" name="FrkExtModel" default="all" basedir=".">
  <property environment="env"/>
  <property file="build.properties"/>
  <path id="library.ADF.Model.Runtime">
    <pathelement location="${oracle.commons}/modules/oracle.idm_12.1.3/identitystore.jar"/>
    <pathelement location="${oracle.commons}/modules/oracle.adf.model_12.1.3/adfm.jar"/>
    <pathelement location="${oracle.commons}/modules/groovy-all-2.1.6.jar"/>
    <pathelement location="${oracle.commons}/modules/oracle.adf.model_12.1.3/adftransactionsdt.jar"/>
    <pathelement location="${oracle.commons}/modules/oracle.adf.view_12.1.3/adf-dt-at-rt.jar"/>
    <pathelement location="${oracle.commons}/modules/oracle.adf.model_12.1.3/adfdt_common.jar"/>
    <pathelement location="${oracle.commons}/modules/oracle.adf.model_12.1.3/adflibrary.jar"/>
    <pathelement location="${oracle.commons}/modules/oracle.xdk_12.1.3/xmlparserv2.jar"/>
    <pathelement location="${oracle.commons}/modules/oracle.adf.model_12.1.3/db-ca.jar"/>
    <pathelement location="${oracle.commons}/modules/oracle.adf.model_12.1.3/jdev-cm.jar"/>
    <pathelement location="${oracle.commons}/modules/oracle.ldap_12.1.3/ojmisc.jar"/>
    <pathelement location="${oracle.commons}/modules/oracle.adf.share_12.1.3/commons-el.jar"/>
    <pathelement location="${oracle.commons}/modules/oracle.adf.share_12.1.3/jsp-el-api.jar"/>
    <pathelement location="${oracle.commons}/modules/oracle.adf.share_12.1.3/oracle-el.jar"/>
    <pathelement location="${oracle.commons}/modules/oracle.adf.security_12.1.3/adf-share-security.jar"/>
    <pathelement location="${oracle.commons}/modules/oracle.adf.security_12.1.3/adf-controller-security.jar"/>
    <pathelement location="${oracle.commons}/modules/javax.mail_2.0.0.0_1-4-4.jar"/>
  </path>
  <path id="classpath">
    <path refid="library.ADF.Model.Runtime"/>
  </path>
  <target name="init">
    <tstamp/>
    <mkdir dir="${output.dir}"/>
  </target>
  <target name="info">
    <echo level="info">build: env.ORACLE_HOME=${env.ORACLE_HOME_12C3}</echo>
    <echo level="info">build: env.WORKSPACE=${env.WORKSPACE}</echo>
    <echo level="info">build: workspace=${workspace}</echo>
    <echo level="info">build: install.dir=${env.ORACLE_HOME_12C3}</echo>
    <echo level="info">build: oracle.commons=${oracle.commons}</echo>
    <echo level="info">build: oracle.jdeveloper.ant.library=${oracle.jdeveloper.ant.library}</echo>
    <echo level="info">build: oracle.jdeveloper.ojdeploy.path=${oracle.jdeveloper.ojdeploy.path}</echo>
    <echo level="info">build: oracle.jdeveloper.deploy.dir=${oracle.jdeveloper.deploy.dir}</echo>
    <echo level="info">build: oracle.jdeveloper.deploy.profile.name=${oracle.jdeveloper.deploy.profile.name}</echo>
    <echo level="info">build: oracle.jdeveloper.workspace.path=${oracle.jdeveloper.workspace.path}</echo>
    <echo level="info">build: oracle.jdeveloper.deploy.outputfile=${oracle.jdeveloper.deploy.outputfile}</echo>
  </target>
  <target name="all" description="Build the project" depends="info,deploy,compile,copy"/>
  <target name="clean" description="Clean the project">
    <delete includeemptydirs="true" quiet="true">
      <fileset dir="${output.dir}" includes="**/*"/>
    </delete>
  </target>
  <target name="deploy" description="Deploy JDeveloper profiles" depends="init">
    <taskdef name="ojdeploy" classname="oracle.jdeveloper.deploy.ant.OJDeployAntTask" uri="oraclelib:OJDeployAntTask"
             classpath="${oracle.jdeveloper.ant.library}"/>
    <ora:ojdeploy xmlns:ora="oraclelib:OJDeployAntTask" executable="${oracle.jdeveloper.ojdeploy.path}"
                  ora:buildscript="${oracle.jdeveloper.deploy.dir}/ojdeploy-build.xml"
                  ora:statuslog="${oracle.jdeveloper.deploy.dir}/ojdeploy-statuslog.xml">
      <ora:deploy>
        <ora:parameter name="workspace" value="${oracle.jdeveloper.workspace.path}"/>
        <ora:parameter name="project" value="${oracle.jdeveloper.project.name}"/>
        <ora:parameter name="profile" value="${oracle.jdeveloper.deploy.profile.name}"/>
        <ora:parameter name="nocompile" value="false"/>
        <ora:parameter name="outputfile" value="${oracle.jdeveloper.deploy.outputfile}"/>
      </ora:deploy>
    </ora:ojdeploy>
  </target>
  <target name="compile" description="Compile Java source files" depends="init">
    <javac destdir="${output.dir}" classpathref="classpath" debug="${javac.debug}" nowarn="${javac.nowarn}"
           deprecation="${javac.deprecation}" encoding="UTF8" source="1.7" target="1.7" includeantruntime="false">
      <src path="src"/>
    </javac>
  </target>
  <target name="copy" description="Copy files to output directory" depends="init">
    <patternset id="copy.patterns">
      <include name="**/*.GIF"/>
      <include name="**/*.JPEG"/>
      <include name="**/*.JPG"/>
      <include name="**/*.PNG"/>
      <include name="**/*.cpx"/>
      <include name="**/*.dcx"/>
      <include name="**/*.ejx"/>
      <include name="**/*.gif"/>
      <include name="**/*.ini"/>
      <include name="**/*.jpeg"/>
      <include name="**/*.jpg"/>
      <include name="**/*.png"/>
      <include name="**/*.properties"/>
      <include name="**/*.sva"/>
      <include name="**/*.tag"/>
      <include name="**/*.tld"/>
      <include name="**/*.wsdl"/>
      <include name="**/*.xcfg"/>
      <include name="**/*.xlf"/>
      <include name="**/*.xml"/>
      <include name="**/*.xsd"/>
      <include name="**/*.xsl"/>
      <exclude name="build.xml"/>
    </patternset>
    <copy todir="${output.dir}">
      <fileset dir="src">
        <patternset refid="copy.patterns"/>
      </fileset>
      <fileset dir=".">
        <patternset refid="copy.patterns"/>
      </fileset>
    </copy>
  </target>
</project>

The files above are the original ones and can be run from the build console to get this

Great, we now have successfully enabled CI in the cloud for the ‘Framework Extension’ project. Well, there is something more to think about. Can’t we use the same ANT build scripts on the local machine too?

Yes, we can but we have to make some adjustments for this.

Now that we read the environment from the server the ANT script is running on to set the some of the variables we need to set these environment variables on the local machine too. this can be done easily by altering the jdev start file (Linux) or using a batch to first set the environment variables and then start jdev (Windows). Below is my changes jdev start script

#!/bin/bash

#=============================================================================
#  Launcher for Oracle JDeveloper 12c (12.1.2.0.0)
#=============================================================================

unset -v GNOME_DESKTOP_SESSION_ID
export MIDDLEWARE_HOME_12C3=/opt/jdev/12.1.3.0.0/Oracle/Middleware
export ORACLE_HOME_12C3=/opt/jdev/12.1.3.0.0/Oracle/Middleware/Oracle_Home/jdeveloper
export WORKSPACE=/data/development/ENTW_12.1.3.0.0
export EXEC_SUFFIX=
/opt/jdev/12.1.3.0.0/Oracle/Middleware/Oracle_Home/jdeveloper/jdev/bin/jdev $1

As you see I set the environment variables which are later read through the build.xml file before starting jdeveloper.
The one line
export EXEC_SUFFIX=
need special attention. It’s only necessary if you run JDev using different operating systems (Linux and Windows). The build file has one variable pointing to the the ojdeploy executable
oracle.jdeveloper.ojdeploy.path=${env.ORACLE_HOME_12C3}/jdev/bin/ojdeploy${env.EXEC_SUFFIX}
Users using Windows need to add the suffix ‘.exe’ to this variable as ojdeploy can’t be started otherwise under Windows.
The problem is that we can’t add it for Linux systems as they don’t know this suffix. The solution I found is to add ${env.EXEC_SUFFIX} to the executable and set it to an empty string for Linux systems. For Windows systems you have to set this environment variable to ‘.exe’. For this I use a batch file where I use
~~~setx EXEC_SUFFIX .exe~~~
before starting JDev. In the same batch I set the other variables too

setx ORACLE_HOME_12C3 r:\Java\12.1.3.0.0\Oracle\Middleware\jdeveloper
setx MIDDLEWARE_HOME_12C3 r:\Java\12.1.3.0.0\Oracle\Middleware
setx EXEC_SUFFIX .exe

Alt NOTE
To make the build files work under Windows and Linux and iOS add an environment variable defining the suffix for executable files.

One final trick is to set the workspace directory. The build.properties file has one more environment variable workspace=${env.WORKSPACE} which we need to set.
As the workspace isn’t fix on a local machine, at least if you have more than one workspace, you can’t set this variable before you start JDev. This has to be done per workspace, when you change the workspace.
JDev has a solution for this in the ANT properties section

ANT Project Properties

ANT Project Properties


You can shoose from different variables JDev sets according to the workspace and project you are working with.
JDeveloper Variables

JDeveloper Variables

Alt NOTE
Set the env.WORKSPACE environment variable in the ANT properties of the project.

This concludes this part of the series. In the next post we finish the feature ‘feature-setup-build’ by introducing the code review function of the Oracle Developer Cloud. This will be followed by a post about building a simple ADF application with a UI which you use to show the Continuous Delivery (CD) option of the Oracle Developer Cloud.

Pitfalls when using libraries of newer version than shipped with JDeveloper or WebLogic Server

A question on JDeveloper & ADF OTN forum cought my attention. A user wanted to use a method of the Apache Commons-IO library named FileUtils.getTempDiretory() but got an error when he tried to use code completion or when he tried to compile the code. The problem was that the compiler (or code completion) did not pick up the right java class from the library even as it was installed in the project a library.
As the original code used belongs to one of my samples I was interested in finding a reason for this behavior as I could see no obvious reason for this behavior.

An inspection of a provided test case quickly revealed the problem and a solution was found too. This blog is about the problem and the solution to it. Lets start with building a test case:


The test case had a model project which used a couple of libraries which we add too to make this sample as close as possible to the test case.
 Model Project Properties

Model Project Properties


There is no code whatsoever used in the model project just the libraries are defined!

To make use of the FileUtils.getTempDiretory() method we have to first download the Apache Commons-IO in a version higher then 2.0. The current version is 2.4 which you get from the given link. Once you unzip the zip (or tar.gz) to a directory of your choice we create a new library for JDeveloper (Tools->Manage Libraries…)

We add This new library to the view controller project


Next is to create a java bean where we try to use the FileUtils.getTempDiretory() method

Here we see the problem mentioned in the OTN question. The FileUtils.getTempDiretory() does not show up at all. The JavaDoc of the Apache Commons-IO 2.4 package shows that the method is available since version 2.0
JavaDoc of FileUtils Class

JavaDoc of FileUtils Class


If we try to compile the code we get an compilation error as seen in the last image.

What is the problem?
Well, it looks like there is another version of the Apache Commons-IO library already loaded in the classpath which gets loaded first. Once a library or class is loaded, another version of the same class will not overwrite the existing one.
First thing we can try is to move the new commons-io library to the top of the list of libraries.
In the test case presented here, this doesn’t work. We still get the same error. So there are libraries loaded before the view controller project libraries come to play.
Remember we added some libraries to the model project even as there is no code in the project at all?
Because the view controller project has dependency defined to the model project when we create an Fusion Web Application by default, libraries of the model project are loaded before the view controller projects.
We have can solve the problem in multiple ways:
1. remove the dependency to the model project. This is not recommended as it would mean that we have to build the model project ourselves if we have to change something in the model and want to run the application.
2. find the library which loads the FindUtils class and see if we can remove it (not all libraries are needed).
3. add the new Apache Commons-IO library to the model project and move it up front. This should load the newer version of the FindUtils class before any other.

Solution 1 isn’t really one. Solution 2 is possible and I’ll blog about it later. For this blog we use solution 3.

Solution
All we have to do is to add the Apache Commons-IO 2.4 library to the model project and move to the top of the list.

Model Project Properties with Commons-IO

Model Project Properties with Commons-IO


If we now rebuild the workspace we see that to error is gone
No Compilation Error

No Compilation Error


The code completion still shows the method red underlined. This is a bug in JDeveloper which doesn’t pick up the right library. Anyway, the compiler will use the right library and we can compile the application.

Now we add another method to the FileBean which returns the path to the temporary directory. This we use in a page index.jsf to show it on the ui.

<?xml version='1.0' encoding='UTF-8'?>
<!DOCTYPE html>
<f:view xmlns:f="http://java.sun.com/jsf/core" xmlns:af="http://xmlns.oracle.com/adf/faces/rich">
  <af:document title="index.jsf" id="d1">
    <af:form id="f1">
      <af:panelGridLayout id="pgl1">
        <af:gridRow height="50px" id="gr2">
          <af:gridCell width="100%" halign="stretch" valign="stretch" id="gc1">
            <!-- Header -->
            <af:outputText value="Preferred Package Test" id="ot1" inlineStyle="font-size:x-large;"/>
          </af:gridCell>
        </af:gridRow>
        <af:gridRow height="100%" id="gr1">
          <af:gridCell width="100%" halign="stretch" valign="stretch" id="gc2">
            <!-- Content -->
            <af:outputText value="Tempdir path = #{FileBean.tempDir}" id="ot2"/>
          </af:gridCell>
        </af:gridRow>
      </af:panelGridLayout>
    </af:form>
  </af:document>
</f:view>

When we run the application we get an exception

    at weblogic.work.ExecuteThread.execute(ExecuteThread.java:311)
    at weblogic.work.ExecuteThread.run(ExecuteThread.java:263)
Caused by: java.lang.NoSuchMethodError: org.apache.commons.io.FileUtils.getTempDirectoryPath()Ljava/lang/String;
    at de.hahn.blog.preferredpackages.view.beans.FileBean.getTempDir(FileBean.java:16)
    at sun.reflect.NativeMethodAccessorImpl.invoke0(Native Method)
    at sun.reflect.NativeMethodAccessorImpl.invoke(NativeMethodAccessorImpl.java:57)
    at sun.reflect.DelegatingMethodAccessorImpl.invoke(DelegatingMethodAccessorImpl.java:43)
    at java.lang.reflect.Method.invoke(Method.java:606)

Why’s that?
The application compiled without an error and we still get a NoSuchMethodError. The reason for this is that when we start the WebLogic Server the older version of the Apache Commons-IO jar is loaded first, blocking loading of the newer version we need to get to the FileUtils.getTempDirectoryPath() method.
To allow the server to load our newer version of the jar we need to change a descriptor named weblogic-application.xml which is specific for WebLogic Server. For other servers there exist other descriptors allowing the same.
In this descriptor we add a preferred package for the org.apache.commons.io package. Open the weblogic-appliaction.xml descriptor and select the ‘Class Loading…’ node.

Application Descriptors: weblogic-application.xml

Application Descriptors: weblogic-application.xml


Here we enter the package name org.apache.commons.io to the ‘Application Preferred Libraries’ section.

to get this result in the source view of the descriptor:

    <prefer-application-packages>
        <package-name>org.apache.commons.io</package-name>
    </prefer-application-packages>

After restarting the application the index.jsf page show up OK

Running Test Page

Running Test Page

You can download the sample application which was build using JDeveloper 12.1.3 from GitHub.

Change Application Configuration at Run Time through a Properties File (Part 2)

In this second part of the mini series we look into the problem left over from part 1.

We left the task to change the location and name of the property file we read when a configuration property is needed by the application. You my ask why we need to change the path at all. The answer is that most administrators won’t allow you to copy a file to any location on a server. They normally don’t allow access to a production server at all. You can ask them to put put the configuration file to a location of their choice and then configure this path during deployment of the application. This is exactly what we do in this blog.

In the first part we finished the sample application which read a property file from a location we can set via a context parameter in web.xml. The question now is, how to change this parameter during deployment of the application. The answer to this is to use a Deployment Plan.

Typically, deployment plans are created by developers along with the associated application files, then distributed to the administrator or another deployer, who updates the plan for a particular environment (such as staging, testing, or production). The deployment plan is stored outside of an application archive or exploded archive directory. We store the initial plan in the ViewControllers src/META-INF folder as BlogReadConfigFile_Plan.xml.

<?xml version='1.0' encoding='UTF-8'?>
<deployment-plan xmlns="http://xmlns.oracle.com/weblogic/deployment-plan" xmlns:xsi="http://www.w3.org/2001/XMLSchema-instance"
                 xsi:schemaLocation="http://xmlns.oracle.com/weblogic/deployment-plan http://xmlns.oracle.com/weblogic/deployment-plan/1.0/deployment-plan.xsd">
    <application-name>BlogReadConfigFile</application-name>
    <variable-definition>
        <variable>
            <name>ResourceFileLocation</name>
            <value>/tmp/readconfigfile.properties</value>
        </variable>
    </variable-definition>
    <module-override>
        <module-name>BlogReadConfigFile_BRCFViewController_webapp.war</module-name>
        <module-type>war</module-type>
        <module-descriptor external="false">
            <root-element>web-app</root-element>
            <uri>WEB-INF/web.xml</uri>
            <variable-assignment>
                <name>ResourceFileLocation</name>
                <xpath>/web-app/context-param/[param-name="de.hahn.blog.readconfigfile.FILENAME"]/param-value</xpath>
                <operation>replace</operation>
            </variable-assignment>
        </module-descriptor>
    </module-override>
</deployment-plan>

There are three notable parts in the plan. The first is the application name which is the same as you set under application properties in the deployment descriptor


The second section is the variable-definition section. Here we define variables which we later can use in the other parts of the descriptor as reference. Without a variable definition we can’t change a thing in the plan.
We name our variable ‘ResourceFileLocation’ and set the value to any appropriate location we like. This location don’t have to exist on the target server. We change it later anyway.
The third part is the module-overwrite where we specify which part of the of any descriptor, which is part of the deployment, we like to change.
It’s essential to name all parts exactly as they are named in the descriptors in your application.

The module name is the name of the war file we build, the type is war, as we build a war artifact. The root element describes which section of the deployed application we want to change and the URI exactly where the descriptor is located relative from its root.
The interesting part is the variable-assignment where we specify the variable name defined in the variable-definition section and which element of the defined module we want to change. This is done with a XPath expression:

<xpath>/web-app/context-param/[param-name="de.hahn.blog.readconfigfile.FILENAME"]/param-value</xpath>

which describes the location of the context parameter in web.xml with the name “de.hahn.blog.readconfigfile.FILENAME” and set it’s value to the variable value.
The operation tells what we want to do. As we want to replace the value we choose REPLACE as operation.

To make the setup complete we have to specify the BlogReadConfigFile_Plan.xml in the application properties

EAR Deployment Profile Properties

EAR Deployment Profile Properties


For more info about how to use deployment plans refer to the documentation at How to Use Deployment Plans

We can now deploy the application as usual and run the application from within JDeveloper. To show how it’s done when you deploy the application to a stand alone server we first create the ear file, then start the integrated WLS in JDevloper and open the admin console to deploy the application

Deploy the Application

Deploy the Application


which will create the ear file as we see in the log window

[06:33:59 PM] ----  Deployment started.  ----
[06:33:59 PM] Target platform is  (Weblogic 12.x).
[06:33:59 PM] Running dependency analysis...
[06:33:59 PM] Building...
[06:33:59 PM] Deploying 2 profiles...
[06:33:59 PM] Wrote Web Application Module to /data/development/ENTW_12.1.3.0.0/QT/BlogReadConfigFile/BRCFViewController/deploy/BlogReadConfigFile_BRCFViewController_webapp.war
[06:33:59 PM] Wrote Enterprise Application Module to /data/development/ENTW_12.1.3.0.0/QT/BlogReadConfigFile/deploy/BlogReadConfigFile.ear
[06:33:59 PM] Elapsed time for deployment:  1 second
[06:33:59 PM] ----  Deployment finished.  ----

Next step is to open the admin console and to deploy the ear file


If we run the application we see that the application tries to read the properties file in the log window
Running Application

Running Application


We now want to change the properties file the application is using. For this we change the location and name of the properties file we configured in the web.xml file and change the content of the properties file:

The UI has not changed, however, after you click the refresh Properties button and look into the log output you see
Application Tries to Read Properties from New Location

Application Tries to Read Properties from New Location


Please note that the location of the properties file has changed. If we had the file at the position defined in the deployment plan, the application would have read the properties from there.

Change Application Configuration at Run Time through a Properties File (Part 1)

Often users ask how to change some configuration properties, e.g. a reprot definition file or endpoint of a web service, art runtime of the application. This is not an easy task as such configuration normally is deployed together with the application as part of the ear file. This however can’t be changed easily.

There are different possible solutions, like providing a Mbean which then can be used in the weblogic servers admin console to change values. A sample for this approach can be found e.g. here Creating Mbeans(JMX) in ADF Application and accessing them from jrockit mission control.

In this blog I show a different approach which uses a configuration file which can be changed externally. The values read from the file are properties (key value pairs). If we make changes to the file they are reflected during run time without the need to restart the application. Keep in mind that this approach does not work will on a clustered system as there are multiple servers with multiple file locations which have to change. One way to overcome this is to set the location on e shared file system which can be accessed from all servers.

To implement this use case we first have to think about how we get the path to the configuration file and it’s name to load it during run time.

To get the path the the configuration file we use a context parameter which we define in the web.xml file. The reason for this is that we need to change this parameter depending on the system we deploy the application too. In addition you can’t make predictions like where an administrator likes to put the configuration file.

Context Parameter in web.xml

Context Parameter in web.xml

To load the properties we can use java default Properties class which loads properties from a stream. The bit and bytes can be found in the source of the work space which is available GitHub (see link at the end of the post).

One thing to notice is that this post uses Apache Commons-IO version 2.4. This update make one other change necessary in the weblogic-application.xml file.

  <prefer-application-packages>
    <package-name>org.apache.commons.io</package-name>
  </prefer-application-packages>

This entry allows the application to use the included commons-io jar to be loaded before the already available commons-io jar, of an older version, in WebLogic server 12.1.3.

After setting the parameter let’s write a sample page where we show some of the properties on the page, then change the configuration reset the properties and see the changes on the page.
For the implementation we use an application scope bean. The reason is that the configuration parameter should be available application wide. There is no need to keep this info per session. If you read the configuration file for every parameter you can use a request scope bean.

In a live system I would not recommend using this approach (reading the configuration file every time) because it produces a bottleneck reading the file over and over again. Instead I would call a method periodically or as the result of a user action like button click.

OK, let’s create a configuration file in the WEB-INF folder or if you like in any other folder. Once the file is created we copy it into a temporary folder on the system (/tmp on mine) and read it from there.


Now we need an application scope bean

The bean has a getProperties method which checks if the proprieties are already read or if not read the context parameter from web.xml to read the file from the given position.

    /**
     * This method savely get the properties from a file if the file can be read, otherwise it return an empty properties object
     * @return Properties object read from file of empty properties object if hte file was empty or could not be found
     */
    public Properties getProperties() {
        if (properties == null) {
            FileInputStream fileInputStream = null;
            try {
                // read context parameter
                String initParameter = FacesContext.getCurrentInstance().getExternalContext().getInitParameter(PROPERTYFILE_PARAMETER);
                logger.info("Read properties from " + initParameter);
                // try to read the file
                File file = FileUtils.getFile(initParameter);
                fileInputStream = FileUtils.openInputStream(file);
                properties = new Properties();
                properties.load(fileInputStream);
                logger.info(properties.size() + " properties successfully read.");
            } catch (IOException ioe) {
                logger.warning("Error: Property file could not be read!", ioe);
                properties = new Properties();
            } finally {
                if (fileInputStream != null)
                    try {
                        fileInputStream.close();
                    } catch (IOException e) {
                        e.printStackTrace();
                    }
            }
        }
        return properties;
    }

    /**
     * Reset the read properties so that the next try to read a property ready the file again
     */
    public void readPropertiesAgain() {
        logger.info("Reset properties!");
        properties = null;
    }

    /**
     * Method to return the version information of the configuration file.
     * this information is compiled from the keys PROPERY_NAME and PROPERTY_VERSION
     * @return version information read from the file
     */
    public String getPropertyVersionInfo() {
        String property = getProperty(PROPERTY_NAME);
        String property_2 = getProperty(PROPERTY_VERSION);
        String res = "Unkown";
        if (property != null && property_2 != null) {
            res = property + " " + property_2;
        }
        logger.info("Properyinfo: " + res);

        return res;
    }

The second method is used to reset the local storage of the properties, so that the next time a property is read the whole file will be read again. The third method is used to get the version information of the configuration file which is build as the concatenation of two properties.

On a page we add a button to reset the properties in the application scoped bean. After this the configuration file will be read again.

<af:button text="Read Configuration again" id="b1"
 actionListener="#{ReadPropertyFileBean.rereadActionListener}"
 partialSubmit="true"/>

Finally we add an outputText component to the page which uses an EL to read the PropertyVersionInfo from the application scoped bean ‘ReadPropertyFileBean’

<af:outputText id="ot6" inlineStyle="font-size:small;" 
 value="#{ReadPropertyFileBean.propertyVersionInfo}"
 partialTriggers="b1"/>

When we run the application we see the inital screen like

Initial index.jsf

Initial index.jsf


we change the configuration file
Changed Configuration File

Changed Configuration File


and reset the properties via a click on the button
Changed index.jsf

Changed index.jsf

This concludes part 1. In the final 2nd part we see how to change the fixed path set as context parameter in web.xml during deployment. This allows us to deliver a properties file together with the application but let the administrator decide where to put it on the server.

The work space for this sample can be downloaded from GitHub BlogReadConfigFile Release 1.0 or get the zipped workspace of this release 1.0
The sample is build using JDeveloper 12.1.3 and uses the HR DB schema.